This guide offers comprehensive information regarding no-bake protein balls and is intended strictly for educational and informational purposes.
It is important to remember that this content does not constitute medical advice, diagnosis, or treatment. Always consult with a qualified healthcare professional or registered dietitian before making significant changes to your diet or fitness regimen.
Any claims or suggestions contained herein are based on established nutritional principles and require substantiation by reliable, peer-reviewed sources.
No-bake protein balls represent a convergence of convenience and robust nutrition, delivering optimal high protein treats without the complexity of baking. This comprehensive guide reveals the core methodology, versatile flavor profiles, and significant dietary benefits of crafting these indispensable protein bites.
Mastering these techniques allows for personalized energy management and efficient meal preparation, maximizing the nutritional value of your daily snacking routine. We delve into the essential components and precise ratios required to create perfectly textured, macro-balanced, and utterly delicious power snacks that fuel your body efficiently.
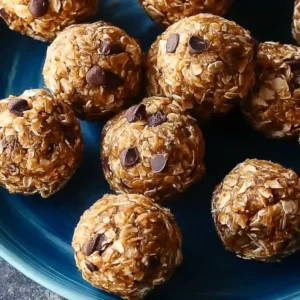
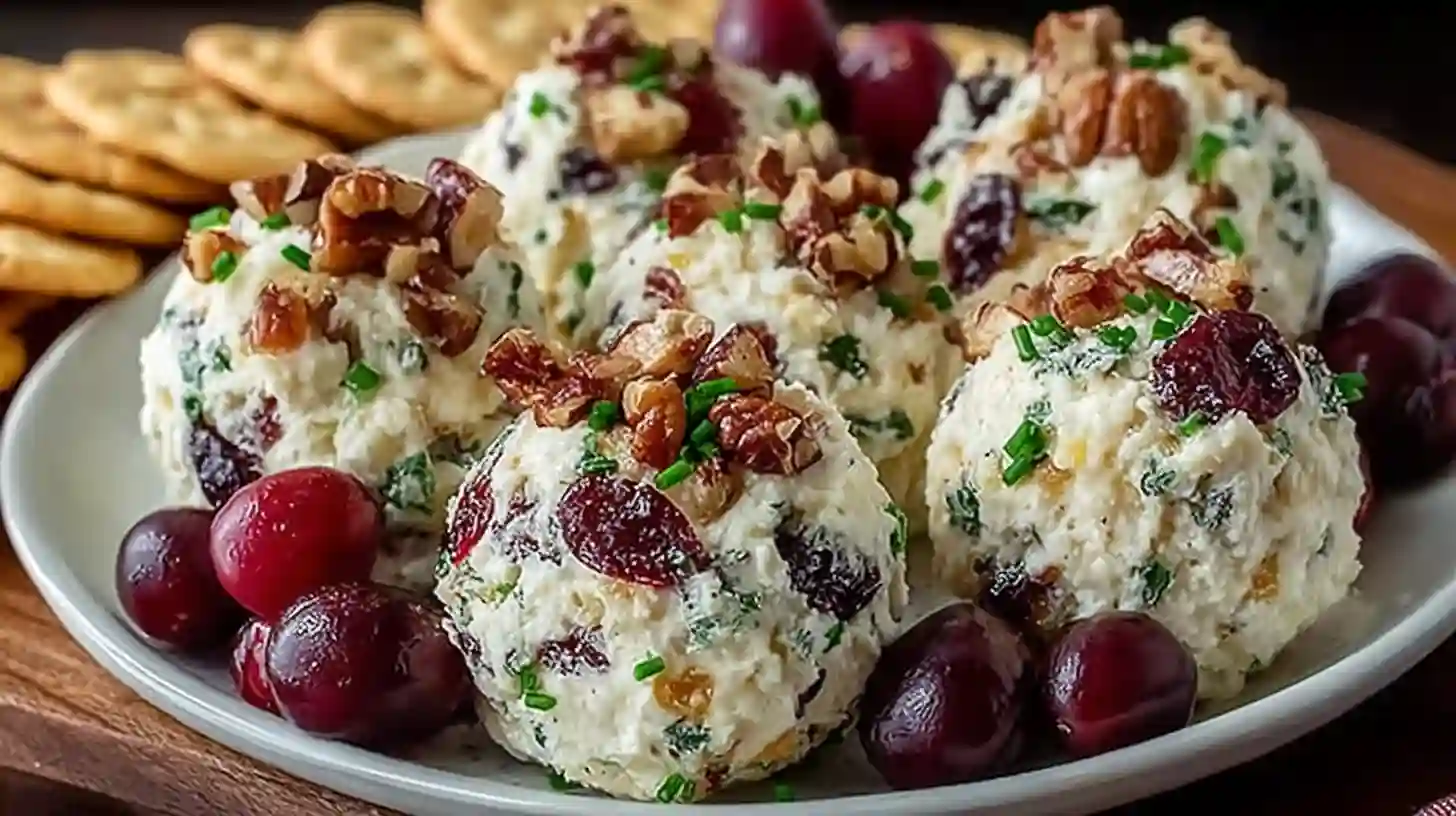
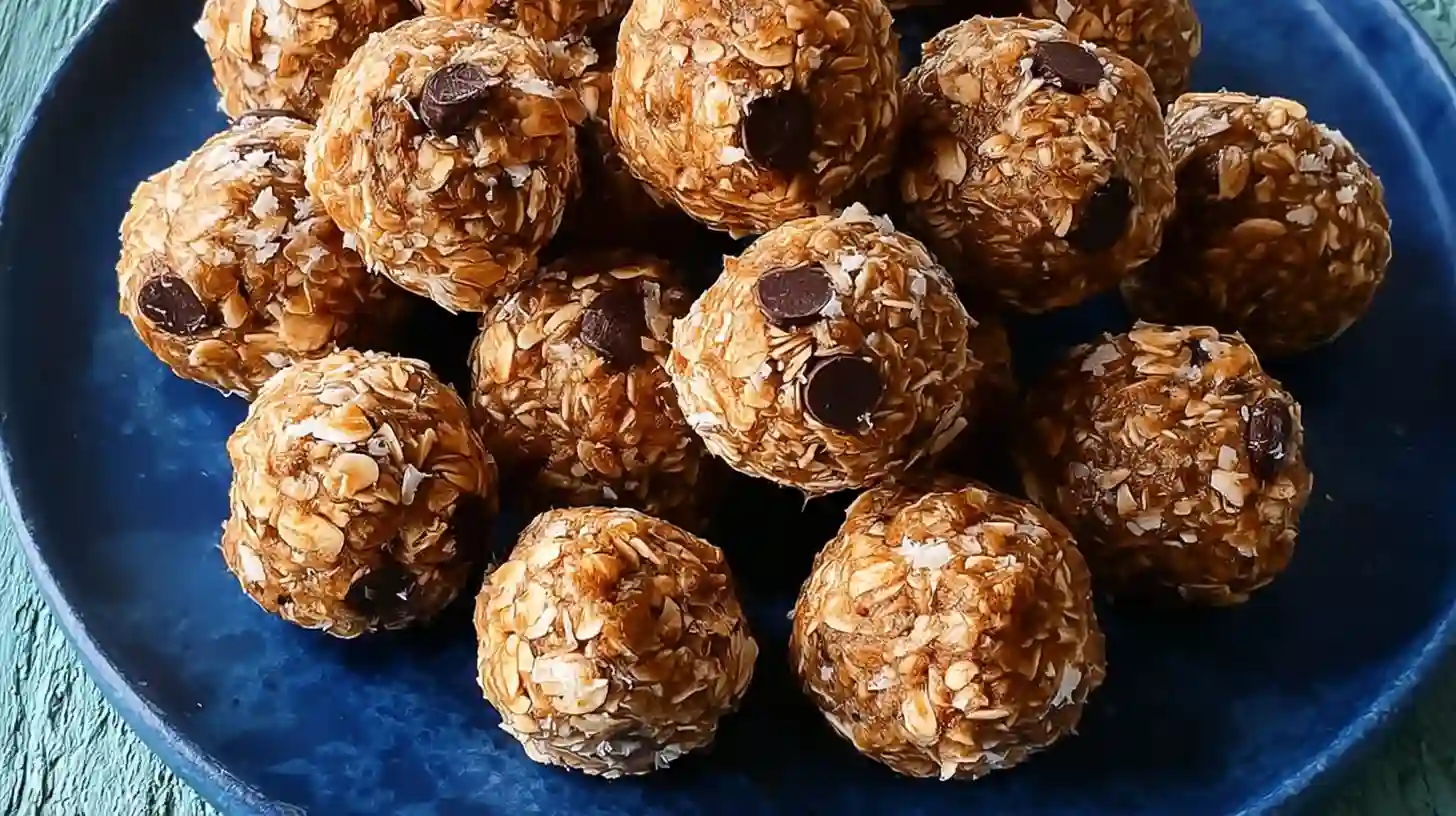
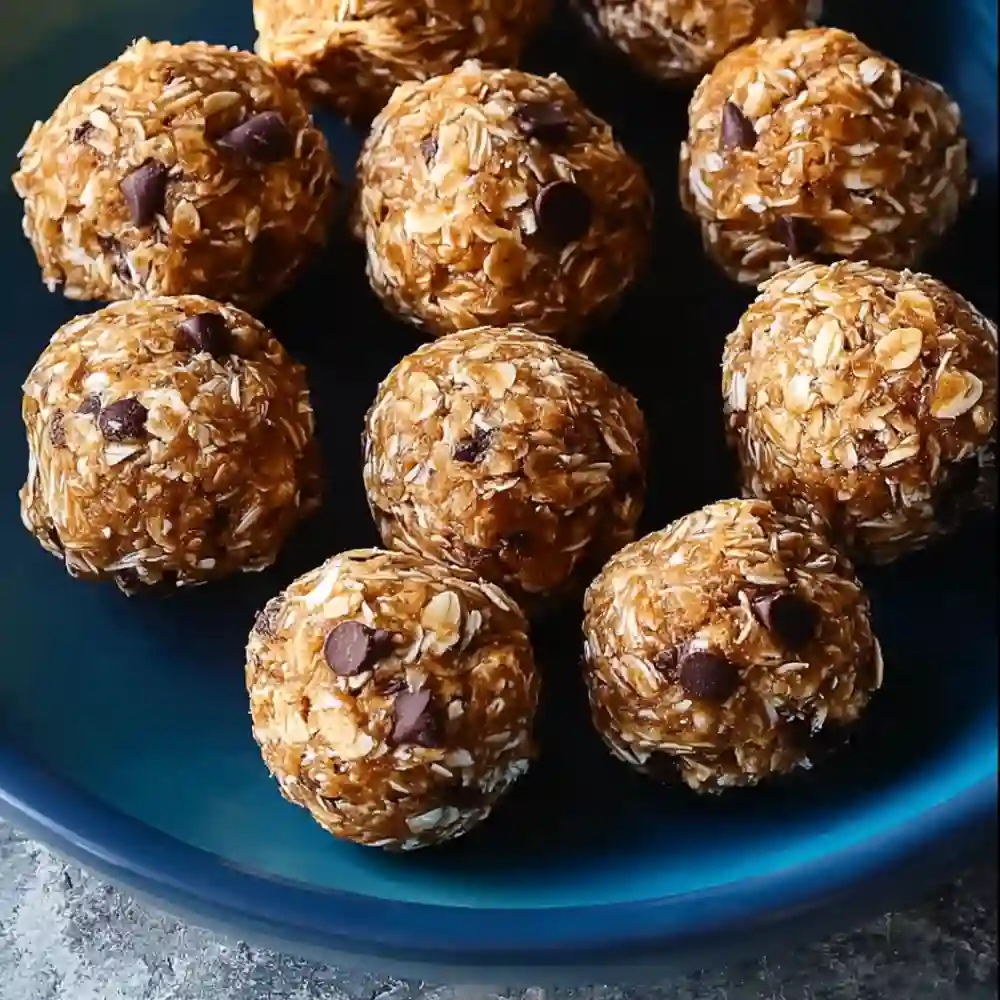
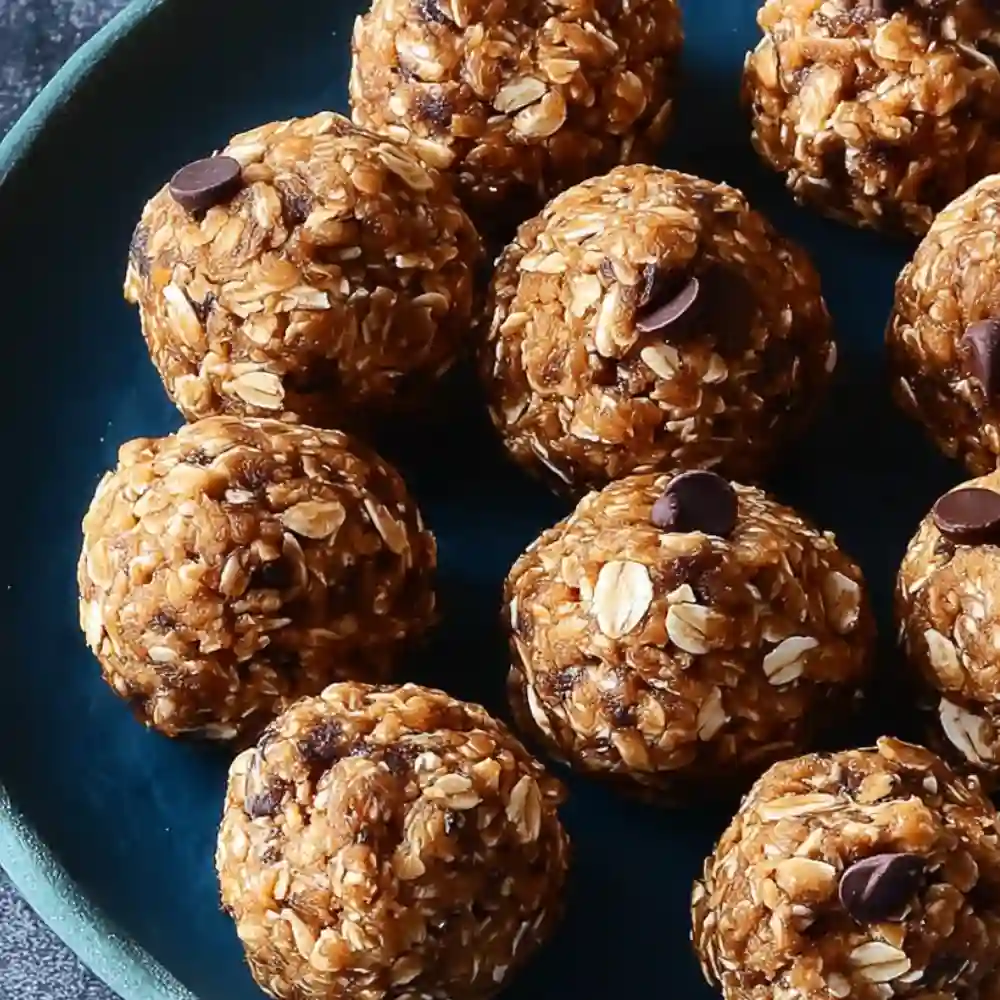
Easy No Bake Protein Balls (4 Ways)
Ingredients
- 1 1/2 cups Chocolate Peanut Butter flavor – rolled oats old fashioned rolled oats
- 1 cup Chocolate Peanut Butter flavor – natural peanut butter
- 1/4 cup Chocolate Peanut Butter flavor – honey or maple syrup
- 2 scoops (~50-60 g) Chocolate Peanut Butter flavor – chocolate protein powder
- 2 Tbsp Chocolate Peanut Butter flavor – chocolate chips
- 1 1/2 cups Almond Joy flavor – rolled oats old fashioned rolled oats
- 1 cup Almond Joy flavor – natural almond butter
- 1/4 cup Almond Joy flavor – honey or maple syrup
- 2 scoops (~50-60 g) Almond Joy flavor – chocolate protein powder
- 1-2 Tbsp Almond Joy flavor – unsweetened shredded coconut
- 1 1/2 cups Cinnamon Raisin Cookie flavor – rolled oats old fashioned rolled oats
- 1 cup Cinnamon Raisin Cookie flavor – cashew butter
- 1/4 cup Cinnamon Raisin Cookie flavor – honey or maple syrup
- 2 scoops (~50-60 g) Cinnamon Raisin Cookie flavor – vanilla protein powder
- 2 Tbsp Cinnamon Raisin Cookie flavor – raisins
- 1/4 tsp Cinnamon Raisin Cookie flavor – cinnamon
- 2 cups Tahini Chocolate Chip flavor – rolled oats old fashioned rolled oats
- 1 cup Tahini Chocolate Chip flavor – tahini
- 1/4 cup Tahini Chocolate Chip flavor – honey or maple syrup
- 2 scoops (~50-60 g) Tahini Chocolate Chip flavor – vanilla protein powder
- 2 Tbsp Tahini Chocolate Chip flavor – mini chocolate chips
Instructions
- Store the protein balls in a covered container in the fridge or freezer.
- Once the mixture is combined, use a small cookie scoop (or spoon) to form the mixture into balls. :contentReference[oaicite:2]{index=2}
- If the mixture is dry or crumbly (some nut butters are drier, or some protein powders absorb more liquid) — add a little water or almond milk, 1 teaspoon at a time, until the dough is moist enough to hold together. :contentReference[oaicite:3]{index=3}
- Store the protein balls in a covered container in the fridge or freezer. :contentReference[oaicite:4]{index=4}
Notes
Table of Contents
The Essential Guide to No-Bake Protein Balls
When I first learned the fundamental tenets of efficient and wholesome food preparation, I was spending a summer in the south of France with my Tante Solange. She did not bake often, preferring instead the vibrant freshness of whole, unprocessed ingredients. One afternoon, I watched her combine a handful of oats, some finely chopped dates, and a rich, dark seed paste, rolling the mixture into small, dense spheres.
“These are bouchées d’énergie,” she explained, emphasizing the efficiency and nutritional intent behind these little bites. She was, in essence, making the precursor to what we now know as no-bake protein balls a genius solution to the perpetual demand for quick, healthy sustenance.
Why No-Bake Protein Balls Are the Ultimate Healthy Snack
These small, dense spheres of nutrition have rapidly become a staple for athletes, busy professionals, and anyone committed to clean eating, and the reasons are compelling.
Their foundation lies in a simple, customizable matrix of whole foods, delivering a balanced blend of macronutrients that support sustained energy without the drastic spikes and crashes associated with highly processed snacks.
I find it amazing to think about the nutritional density that can be packed into a single bite, making these a far superior choice to most packaged snack bars. This superior formulation is critical for managing energy levels throughout a demanding workday or rigorous training session.
Convenience and Easy Meal Prep: The ‘No-Bake’ Advantage
The sheer simplicity of preparation is the crowning benefit of these treats; the “no-bake” designation removes the necessity for ovens, precise temperature control, or extensive cleaning.
Preparation often involves little more than a bowl and a sturdy spoon, facilitating large-batch creation that seamlessly integrates into a weekly meal prep schedule. In my own kitchen, I prepare a batch on Sunday afternoon, and this simple act provides me with convenient, wholesome snacking options for the entire week. This ease of execution makes them highly accessible, even to those who consider themselves novice cooks.
Nutritional Profile: Balancing Protein, Fiber, and Healthy Fats
The strength of these snacks lies in their macro-balance. They combine a high-quality protein source, typically from powder or a protein-rich nut butter, with complex carbohydrates (oats) and healthy monounsaturated or polyunsaturated fats (nut and seed butters).
Protein is fundamental for satiety and muscle maintenance, fiber (from oats and seeds) supports digestive health, and the fats contribute to sustained energy and essential nutrient absorption. This synergy of components creates a functionally complete snack designed to nourish and sustain.
Addressing Common Misconceptions: Protein Balls vs. Energy Bites
While often used interchangeably, a distinction exists between protein balls and general energy bites. Energy bites frequently rely heavily on simple sugars from dried fruits (like dates) for binding and immediate energy, sometimes containing minimal added protein powder.
Conversely, a true no-bake protein ball recipe intentionally prioritizes a higher ratio of protein powder and/or nut butter to achieve a specific, elevated protein content per serving. The distinction hinges on the primary functional goal: immediate energy versus sustained satiety and muscle support.
The 4 Core Ingredients for Any No-Bake Protein Balls Recipe
Every successful recipe for these energy-dense snacks fundamentally relies upon four core components, and I have found that balancing these elements is the key to achieving the optimal texture and flavor. Understanding the role of each ingredient is essential for effective customization.
Binder (Nut Butter/Seed Butter): Peanut Butter, Almond Butter, or Tahini
The binder serves as the sticky glue holding the entire mixture together and is a primary source of healthy fats and additional protein. Peanut butter and almond butter are the most popular choices, but cashew butter offers a milder flavor, and tahini provides an excellent, strong-flavored, seed-based, and often nut-free alternative.
The natural oils in the binder are what prevent the final product from being too crumbly.
Dry Bulk (Oats/Flour): Rolled Oats, Quick Oats, or Almond Flour
The dry bulk is what gives the ball its structure and primary source of complex carbohydrates and fiber. Rolled oats provide the best texture and chewiness, while quick oats absorb moisture faster and result in a smoother ball.
I sometimes use almond flour in conjunction with or as a substitute for oats when I am creating a recipe specifically for a lower-carbohydrate dietary need.
Sweetener (Sticky Agent): Honey, Maple Syrup, or Dates
A liquid sweetener is necessary not only for flavor but also as a secondary binder. Honey is a classic choice, and maple syrup is an excellent vegan alternative, both contributing a sticky sweetness.
For whole-food High Protein Desserts, blended dates can provide the necessary sweetness and fibrous structure, requiring slightly more liquid addition to maintain the correct consistency.
Protein Source: Why Powder is the Go-To for High-Protein Balls
The addition of a quality protein powder is what elevates a simple energy bite into a High Protein Energy Balls formulation. Protein powderswhether whey protein, casein, or a plant-based protein blendare highly concentrated sources of protein that significantly increase the nutritional yield of the final product.
I utilize protein powder to ensure that each bite delivers a substantial protein payload, making the snack genuinely beneficial for recovery and satiety.
Mastering the Basic No-Bake Protein Ball Recipe
My mother, a woman of great patience and precision in the kitchen, always emphasized the importance of mastering the fundamental steps before attempting elaborate variations. The basic recipe for no-bake protein balls is remarkably simple, yet I have observed that success lies in understanding the subtle textural dynamics of the ingredients.
The process requires focus on mixing technique and dough consistency to achieve that perfect, non-sticky, rollable texture.
Detailed Step-by-Step Instructions: How to make easy healthy protein balls
Creating these protein balls begins with careful ingredient measurement, a step that I find is often overlooked but critical for the final texture.
I ensure that my nut butter is stirred well before measuring, preventing the separation of oil and solids from affecting the recipe’s liquid ratio. The preparation is generally divided into three major stages: combining the ingredients, mixing the dough, and shaping the balls.
Preparation and Tools: One-Bowl Method vs. Food Processor Use
The one-bowl method is my preferred approach for its minimal cleanup, particularly when using smooth nut butters and quick oats. This method is ideal for simple recipes where the oats are fine enough to mix in without further processing.
However, when I incorporate whole, dried dates or want a completely smooth, uniform texture, I find that a food processor is indispensable. The processor ensures all fibrous ingredients are finely ground, which creates a more uniform and easier-to-roll dough.
The “Wet First” or “Dry First” Mixing Technique
I generally recommend the “Wet First” mixing technique. I combine the liquid ingredientsnut butter, liquid sweetener (honey or maple syrup), and any extractsfirst, ensuring they are thoroughly incorporated. This establishes the necessary binding matrix.
I then gradually add the dry ingredients: the protein powder, oats, and any mix-ins. Adding the dry components slowly allows me to monitor the dough consistency and adjust liquid volume if necessary, which is crucial for preventing a crumbly mixture.
Rolling Tips: Achieving the Perfect Uniform Ball Size and Texture
Once the mixture is fully combined, I use a small cookie scoop to ensure consistent portion control and size across all my protein bites. Consistency is key for uniform storage and nutritional tracking.
I then roll the scoops between the palms of my hands with gentle but firm pressure. If the dough is sticking to my hands excessively, I may lightly moisten my palms with water or a bit of oat flour. The final ball should be smooth, dense, and hold its shape perfectly.
Troubleshooting Texture Issues for Perfect No-Bake Protein Balls
The most common challenge I encounter when teaching others this recipe is managing the texture. The consistency of the dough must be pliablenot too dry, which causes crumbling, and not too wet, which makes it impossible to roll.
Why do my protein balls keep falling apart? (Too dry/Not enough binder)
A mixture that is too dry indicates insufficient liquid or binder. This often happens if the protein powder is extremely absorbent (like casein) or if too much dry bulk was added. I remedy this by adding a small amount of extra binder (a half teaspoon of nut butter) or a tiny splash of liquid (water, unsweetened almond milk, or extra maple syrup), mixing well until the crumbling ceases and the dough holds when squeezed.
Fixing a Mixture That Is Too Sticky or Too Wet (Adding more dry ingredients)
If the mixture is too wet, it becomes overly sticky and cannot be rolled effectively. This usually results from an oily nut butter or excessive liquid sweetener.
My solution is to incorporate an extra tablespoon of dry bulkeither more oats (often quick oats for better absorption) or additional protein powder. I always add this in small increments, mixing thoroughly after each addition, until the mixture pulls away cleanly from the sides of the bowl.
The Importance of Chill Time: Setting the Dough Before Rolling
A brief chilling period is a non-negotiable step that significantly improves the final texture and ease of rolling.
I place the mixed dough into the refrigerator for approximately 15 to 30 minutes. This time allows the oats to hydrate fully and the fats to slightly solidify, resulting in a firmer, less sticky, and much more manageable dough. This step is particularly vital when creating Protein Balls Recipes With Protein Powder, as the powder requires time to fully absorb the moisture.
Endless Flavor Customization and Variations
The foundational recipe for no-bake energy balls is merely a canvas awaiting a personalized flourish. The true appeal of these snacks lies in the boundless potential for flavor customization, allowing me to tailor them precisely to my current cravings or dietary needs. It truly is amazing how slight adjustments to the mix-ins or the type of protein powder can transform the entire experience.
Building Your Flavor Base: Matching Nut Butter and Protein Powder Flavors
The most successful flavor combinations start with pairing the base ingredients intelligently. I always consider the flavor profiles of my nut butter and my protein powder together. For a robust profile, I might use peanut butter with a chocolate-flavored powder.
For a light, more subtly sweet treat, I typically opt for cashew butter or tahini paired with a vanilla or unflavored protein powder. This intentional pairing ensures a harmonious taste experience that is far superior to simply throwing ingredients together.
What kind of protein powder is good for protein balls? (Whey, Casein, Plant-Based)
The choice of protein powder is critical, not just for nutrition but for texture. Whey protein blends well and provides excellent nutritional value, but certain types can make the dough slightly crumbly.
Casein protein is highly absorbent, often requiring more liquid, but it yields a very thick, dough-like texture that is excellent for rolling. For my vegan recipes, I rely on plant-based protein blends (like pea or brown rice), which often offer a desirable, slightly earthy texture.
Optimal Protein Concentration: How much protein powder should you put in protein balls?
Determining the ideal amount of protein powder is a balance of taste, texture, and nutritional goal. I find that for a Macro Protein Balls recipe, using approximately 1.5 to 2 scoops of powder for every one cup of oats and one cup of binder generally yields a high-protein concentration without compromising the binding capacity.
The total amount, however, must be adjusted based on the absorbency of the specific powder being utilized. This ratio is what elevates the snack into a truly protein-rich offering.
Nut-Free and Vegan Alternatives (Sunflower Seed Butter, Maple Syrup, Chickpeas)
To accommodate various dietary restrictions, I actively explore nut-free and vegan substitutes. Sunflower seed butter or tahini are fantastic replacements for peanut butter or almond butter, providing the necessary fat and binding properties without nuts.
For a completely vegan formulation, I ensure the use of maple syrup instead of honey and a plant-based protein powder. Interestingly, blended, cooked chickpeas can also be used as a binding base for a mild-flavored, high-fiber, legume-based ball, a truly innovative approach.
Top 5 Delicious No-Bake Protein Balls Flavor Profiles
My experience has led me to develop several core flavor profiles that consistently perform well and satisfy a wide range of palates. These five variations cover everything from classic comfort food to light, seasonal delights.
Classic Peanut Butter Chocolate Chip (The Beginner’s Choice)
This profile is arguably the most popular and easiest to master. I combine natural peanut butter, vanilla protein powder, rolled oats, and mini chocolate chips.
The pairing of peanut butter and chocolate is a universally loved combination, offering a nostalgic flavor that makes this the perfect entry point for anyone trying Protein Ball Recipes Healthy for the first time.
Dessert-Inspired: Oatmeal Raisin Cookie and Birthday Cake Bites
For a dessert-inspired profile, I replicate the flavor of an oatmeal raisin cookie by using cashew butter, vanilla protein powder, a pinch of cinnamon, and plump raisins.
The Birthday Cake Bites flavor is achieved by using white chocolate chips (if permissible and suitable), a clear vanilla extract, and colorful sprinkles, focusing on that rich, buttery vanilla flavor.
Chocolate Lover’s Delight: Double Chocolate Brownie Protein Bites
This variation is designed for serious chocolate enthusiasts. I incorporate both chocolate protein powder and unsweetened cocoa powder into the base, binding the mixture with almond butter and adding dark chocolate chips.
The resulting flavor is intense, deeply satisfying, and closely mimics a dense, decadent brownie. These Protein Bites are truly a treat.
Seasonal/Unique: Pumpkin Spice and Lemon Coconut Variations
Seasonal ingredients can add a delightful twist. I create Pumpkin Spice balls by adding canned pumpkin purée (adjusting the dry ingredients accordingly), pumpkin pie spice, and a maple syrup binder.
The Lemon Coconut variation uses tahini for a neutral base, fresh lemon zest and juice for brightness, and finely shredded coconut for texture and flavor, resulting in a light, refreshing snack.
Nutritional Benefits and Specific Dietary Needs
The deliberate composition of these homemade protein balls moves them beyond simple snacking into the realm of functional nutrition.
I view them as strategic tools for achieving specific health and fitness outcomes, and it is imperative to understand how their nutrient profile supports these goals.
How High-Protein Snacks Support Your Fitness Goals
The core value of these snacks lies in their elevated protein content. Protein is the fundamental building block of muscle and plays an integral role in numerous physiological processes.
Consuming a protein-rich snack, such as these Protein Energy Balls Recipe formulations, at strategic times can significantly impact recovery and energy management.
The Role of Protein in Muscle Recovery and Satiety (Appetite Control)
I rely on the protein in these balls to support my muscle recovery post-exercise. The amino acids provided are essential for repairing and rebuilding muscle tissue damaged during physical exertion.
Furthermore, protein has a high satiety index, meaning it promotes feelings of fullness more effectively than carbohydrates or fats alone. This enhanced satiety is critical for appetite control and managing overall caloric intake throughout the day.
Using Protein Balls for Pre- and Post-Workout Fuel
Their balanced macro composition makes them ideal for both pre- and post-workout consumption. Before exercise, the combination of complex carbohydrates (oats) provides sustained energy, preventing fatigue during the session.
After a workout, the protein facilitates the recovery process, while the carbohydrates replenish glycogen stores. I specifically formulate my Low Sugar Protein Balls for post-workout when immediate glycogen replenishment is a priority.
Fiber and Healthy Fats: Boosting Sustained Energy
The inclusion of ingredients like oats, chia seeds, and flax seed ensures a significant fiber content. Fiber slows the digestion and absorption of carbohydrates, which smooths out the energy curve, preventing the rapid blood sugar spikes often caused by simpler snacks.
The healthy fats from nut butter and seeds also contribute to sustained energy and are necessary for the absorption of fat-soluble vitamins, adding to the holistic nutritional benefit.
Adapting the Recipe for Various Dietary Requirements
The beauty of the simple, four-part structure is its flexibility, allowing me to modify the recipe to meet a broad spectrum of specialized dietary requirements.
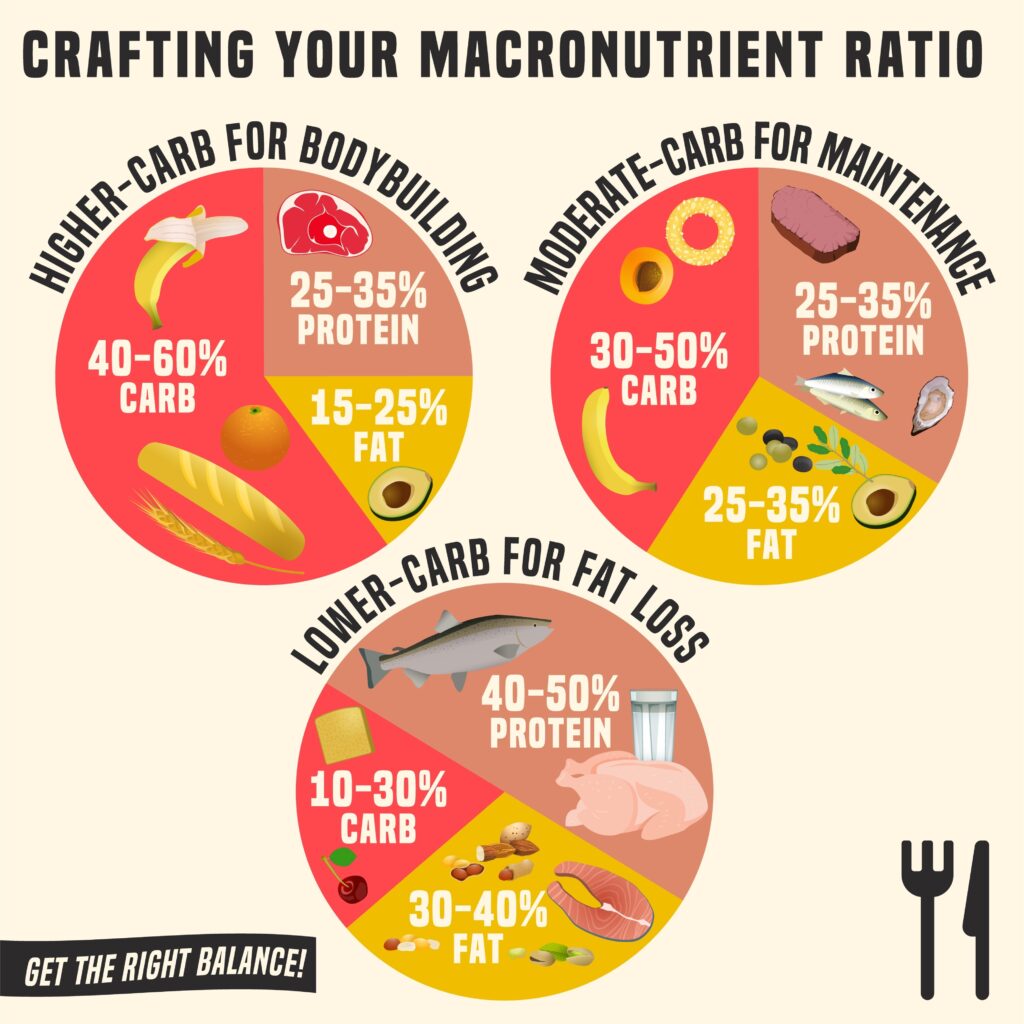
Keto/Low-Carb Protein Balls (Using Almond Flour and Sugar-Free Sweeteners)
For individuals following a ketogenic or low-carbohydrate diet, I substitute the bulk of the oats with almond flour or finely ground shredded coconut. I also replace the honey or maple syrup with a small amount of a suitable sugar-free liquid sweetener.
This adjustment maintains the binding property while drastically reducing the carbohydrate count, creating suitable High Protein Balls Healthy Low Carb snacks.
Shutterstock
Gluten-Free and Dairy-Free Swaps
Creating a gluten-free ball is as simple as ensuring that the rolled oats utilized are certified gluten-free. To make the recipe completely dairy-free, I select a plant-based protein powder and verify that any chocolate chips or add-ins do not contain dairy components. These simple swaps ensure that the snack is accessible to those with common intolerances.
Boosting Nutrient Density with Superfood Add-ins (Chia, Flax, Hemp Seeds)
I routinely boost the nutritional density of my protein balls by incorporating superfood add-ins. A tablespoon of ground flax seed, chia seeds, or hemp seeds significantly increases the omega-3 fatty acid, fiber, and antioxidant content without affecting the texture in a negative way.
These additions transform a healthy snack into a truly nutrient-packed powerhouse. This is a simple yet effective way to maximize the value of every bite.
Storage, Shelf-Life, and On-the-Go Meal Prep
The utility of no-bake protein balls is directly tied to their shelf-life and portability, making the storage phase just as important as the preparation. My approach to meal prep always emphasizes maximizing freshness and convenience, ensuring that these healthy snacks are readily available whenever hunger strikes.
Maximizing Freshness: Should I freeze or refrigerate protein balls?
This is one of the most frequently asked questions I encounter, and the answer depends entirely on the intended consumption timeline. Both refrigeration and freezing are effective methods, but they serve different purposes in the meal prep strategy.
Short-Term Storage: Refrigerating for Daily Snacking (1-2 Weeks)
For the batch of protein balls I intend to consume within a week, refrigerating is the optimal choice. I place the balls in an airtight container and store them in the main compartment of the refrigerator.
The cold temperature maintains the firm texture and prevents spoilage. In my experience, most no-bake energy balls maintain excellent freshness and texture for up to 10 to 14 days when stored correctly in this manner.
Long-Term Storage: Freezing for Batch Prep (Up to 3 Months)
When I prepare a massive batch, I utilize the freezer for long-term preservation. This is particularly useful for Protein Balls Bariatric clients or anyone needing quick, pre-portioned snacks ready for months.
I first flash-freeze the balls on a tray for about an hour to prevent them from sticking together, and then I transfer them to a freezer-safe zip-top bag or airtight container. They can remain perfectly preserved for up to three months. Thawing is simple; I transfer them to the refrigerator overnight or allow them to sit at room temperature for a short time.
The Best Containers for Storing Your No-Bake Energy Balls
The container choice significantly affects the balls’ longevity and taste. I strongly advocate for high-quality, glass, airtight containers to prevent them from absorbing ambient odors from the refrigerator or freezer, which can compromise the flavor.
Using parchment paper between layers in the container also prevents the balls from sticking to one another.
Tips for the Ultimate Protein Ball Meal Prep Strategy
An effective meal prep strategy ensures that healthy eating is convenient and sustainable. No-bake protein balls are perhaps the easiest and most versatile component of any prep plan.
Batch Cooking: Making Multiple Flavors at Once
I frequently dedicate an hour to batch cooking multiple small recipes rather than one large one. I prepare the base ingredients (oats, protein powder, binder, sweetener) for several different flavors simultaneously and then divide the dough into separate bowls.
I then add the unique flavor mix-inssuch as shredded coconut, cocoa powder, or spicesto each bowl. This approach provides flavor variety, which helps prevent palate fatigue throughout the week.
Portion Control and Serving Size Recommendations
A major benefit of rolling the mixture into uniform balls is the automatic nature of portion control. I consider a standard serving size to be one to two balls, depending on the size and the individual’s specific nutritional goals.
For those monitoring caloric intake closely, I recommend weighing the dough and dividing by the desired serving size to ensure precise tracking of macro protein balls.
Travel and Portability: Taking Your Healthy Snacks on the Go
The compact size and density of these balls make them the ultimate portable snack. I always carry a small, insulated container with a few healthy no bake protein bites when I anticipate a long day away from my kitchen.
They hold their shape remarkably well, even at room temperature for a few hours, providing a reliable source of energy and protein to prevent reliance on less healthy, processed options.
More easy Recipes To Try!
Frequently Asked Questions (FAQs)
Navigating the world of homemade snacks often leads to common questions regarding ingredients and preparation. Here, I address some of the most frequent inquiries I receive about crafting the perfect no-bake protein balls.
- How to make easy healthy protein balls?
- I combine a one-to-one ratio of rolled oats and nut butter with a quality protein powder and a sticky sweetener (honey or maple syrup), adding mix-ins like seeds or chocolate chips before rolling and chilling.
- What kind of protein powder is good for protein balls?
- Whey and plant-based protein powders are excellent choices; however, be mindful that casein protein is very absorbent and may require a slight increase in liquid binder to achieve the right consistency.
- Can you make protein balls without a food processor?
- Yes, absolutely. The one-bowl method utilizing a sturdy spoon or spatula is entirely sufficient, especially when using quick oats or pre-ground almond flour.
- Why do my protein balls keep falling apart?
- This is typically because the mixture is too dry. I resolve this by adding a half-teaspoon of liquid binder, such as extra nut butter or maple syrup, until the dough holds together when squeezed.
- How much protein powder should you put in protein balls?
- I recommend starting with 1.5 to 2 scoops of protein powder for a batch yielding 12-16 balls; this ensures a high protein content without making the mixture excessively dry.
- Should I freeze or refrigerate protein balls?
- I refrigerate them for consumption within 1-2 weeks and freeze them for longer-term storage (up to three months). Freezing is the best method for batch prep.