
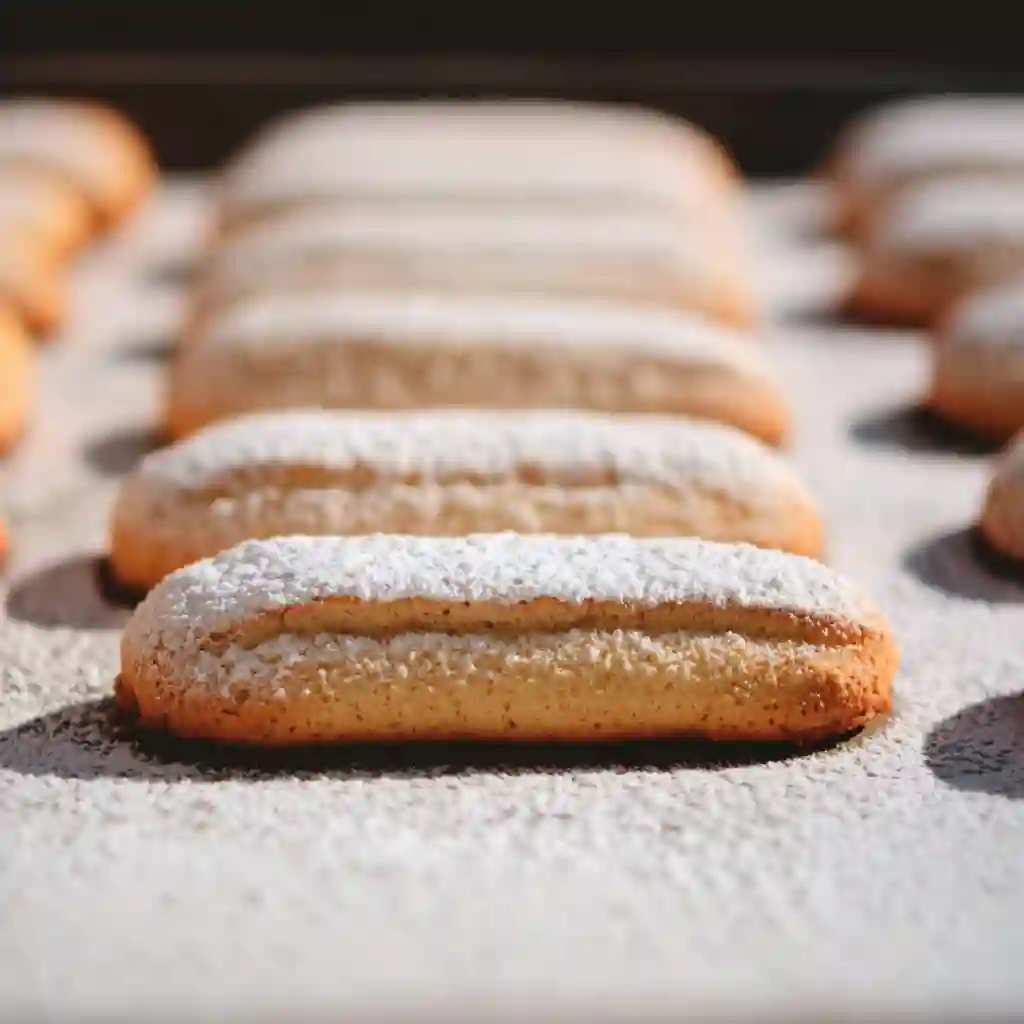
Light, crisp on the outside, airy in the center the perfect gluten-free ladyfinger soaks up espresso without falling apart. That’s the magic behind a great tiramisu. But if you’ve ever tried finding gluten-free sponge fingers at the store, you know the struggle. They’re expensive, often stale, and lack the right texture.
Years ago, I had the same problem while making tiramisu for a family gathering. After hunting down a box of gluten-free ladyfingers that cost nearly ten dollars, I found them dry and flavorless. That night, I decided I’d find a better way. And I did.
This guide gives you everything you need to make them from scratch using simple pantry ingredients. You’ll get a step-by-step video, a flour comparison to help you pick the best blend, and a clear troubleshooting chart for foolproof results. Whether you’re baking for someone with celiac disease or just want better flavor, you’re in the right place.
What Are Sponge fingers gluten free?
Gluten-free sponge fingers are light, finger-shaped sponge cookies known for their crisp outer shell and soft, airy center. They are often used in desserts like tiramisu because they absorb liquid without falling apart.
These cookies go by many names around the world. In Italy, they’re called Savoiardi. In France, they’re known as Boudoir biscuits. Austria calls them Biskotten, and in English-speaking countries, they’re commonly referred to as ladyfingers.
Their unique texture makes them perfect for layered desserts. When baked correctly, they hold their shape while softening just enough when soaked in coffee, syrup, or cream. Making them gluten-free doesn’t mean giving up that perfect balance. With the right ingredients and method, you can enjoy sponge fingers that are just as good as the traditional kind.
Why This Recipe is the Best
Simple Ingredients
You don’t need anything fancy to make these gluten-free sponge fingers. Just everyday items like eggs, sugar, and a good gluten-free flour blend. Everything can be found in a basic pantry or local grocery store.
Foolproof Technique
The key to success lies in how you handle the eggs. This recipe shows you exactly how to whip the yolks and whites to the right texture. It breaks down every step so you’ll understand what to look for and why it matters.
Perfect Texture
These ladyfingers come out light and crisp, ideal for soaking in coffee or layered in creamy desserts. If you prefer a softer bite, simply reduce the baking time slightly. Need a firmer texture for tiramisu? Bake a bit longer for extra crispness.
Completely Dairy-Free
This recipe doesn’t rely on any milk or butter. It’s naturally dairy-free, making it a safe choice for people with both gluten and dairy sensitivities. You get all the flavor and structure without needing to substitute anything.
Choosing the Best Gluten-Free Flour
Not all gluten-free flours work the same. Some create a cookie that’s crisp and light, while others lead to a softer or more cake-like result. The type of flour you use plays a big role in how your sponge fingers turn out.
To help you pick the right one, I tested three popular blends side by side. The results were clear and surprisingly different in both texture and flavor.
| Flour Blend | Photo of Result | Texture Notes | Taste Notes | Best Use |
| Bob’s Red Mill 1-to-1 | ![Photo 1] | Crisp edges with a slightly chewy center | Neutral flavor with a mild sweetness | Great all-purpose choice |
| King Arthur Measure for Measure | ![Photo 2] | Slightly softer, less snap | Clean taste with no aftertaste | Best for trifles |
| Cup4Cup | ![Photo 3] | Crunchiest result, holds shape well | Slight starchy finish | Ideal for tiramisu |
Recommendation
If you’re making tiramisu or any dessert that needs strong cookie structure, Cup4Cup is the winner. For general snacking or layered desserts where a softer bite is fine, King Arthur works beautifully. Bob’s Red Mill offers the most balanced option if you’re looking for a blend that does a little of everything.
Essential Tools and Equipment
Mixer
You’ll need either a stand mixer with a whisk attachment or an electric hand mixer. Whipping the egg whites properly is key, and a good mixer makes this step much easier and more consistent.
Mixing Bowls
Use at least two large, clean bowls. One for the egg yolks and one for the egg whites. Make sure the bowl for the egg whites is completely clean and free from any grease, or the whites won’t whip correctly.
Piping Bag and Tip
A pastry bag fitted with a half-inch round tip gives the best results for shaping the sponge fingers. If you don’t have one, a sturdy zip-top bag with the corner cut off works too.
Kitchen Scale
Measuring by weight gives the most accurate and reliable results, especially when baking with gluten-free flours. Even a small error in flour measurement can affect the final texture.
Other Tools
You’ll also need a spatula for folding the batter, a sifter for the dry ingredients, parchment paper for lining your baking sheets, and at least two baking sheets for piping and baking the cookies.
Ingredients Needed for Sponge fingers gluten free
For the Batter
3 large eggs, room temperature
1 extra egg white, room temperature
1 teaspoon vanilla extract
1 cup or 140 grams of a gluten-free flour blend that includes xanthan gum (such as Kim’s blend or a trusted store-bought version)
One quarter teaspoon fine sea salt
For the Sugar Mixture
Three quarters cup or 150 grams granulated sugar, divided into three equal parts
One quarter cup or 32 grams powdered sugar
Each ingredient plays an important role. The eggs provide lift and structure. The sugar adds sweetness and helps create a crisp shell. The flour blend must include a binder like xanthan gum to hold everything together. Vanilla adds depth and aroma. Sea salt sharpens the overall flavor. Measuring by weight ensures consistent results every time.
How to Make Sponge fingers gluten free
- Preheat the Oven
Set your oven to 350 degrees Fahrenheit. Line two baking sheets with parchment paper and place them aside. This step helps prevent sticking and allows the cookies to bake evenly. - Separate the Eggs
Crack the eggs and place the yolks in one bowl and the whites in another. Be sure no yolk gets into the whites or they won’t whip properly. - Whisk the Yolks
In the bowl with the yolks, add one third of the granulated sugar and the vanilla extract. Whisk until the mixture becomes thick, smooth, and slightly paler in color. This helps build the base flavor and structure. - Whip the Egg Whites
Using a clean whisk attachment, beat the egg whites on medium speed until soft peaks form. The whites should hold a peak that curves slightly at the top. - Add Sugar to Egg Whites
Slowly sprinkle in the second third of granulated sugar while continuing to whip. Beat until the whites become stiff and glossy. They should form straight peaks that stand tall without drooping. - Combine the Mixtures
Spoon a small amount of the whipped egg whites into the yolk mixture to loosen it. Then gently fold in the rest of the whites using a spatula. Take your time and avoid stirring quickly to keep the air inside. - Add Dry Ingredients
Sift the gluten-free flour and salt over the egg mixture. Fold gently until there are no visible streaks of flour. Over-mixing can deflate the batter and lead to flat cookies. - Pipe the Batter
Fill a piping bag fitted with a half-inch round tip. If you don’t have one, use a zip-top bag with a corner snipped off. Pipe lines about three and a half to four inches long onto the prepared baking sheets. Leave space between each finger. - Dust with Sugar
Mix the final third of granulated sugar with the powdered sugar. Sift this mixture evenly over the piped batter. This creates a light crunch and golden finish. - Bake the Cookies
Place one tray in the oven at a time. Bake for 14 to 15 minutes or until the fingers are lightly golden, slightly cracked on top, and firm to the touch. - Cool Completely
Let the cookies rest on the baking sheet for five minutes. Then transfer them to a wire rack to cool fully. They may feel soft at first but will become crisp as they sit.
Troubleshooting Guide
Making gluten-free sponge fingers can be simple with the right technique, but small issues can still come up. Here’s how to fix the most common problems.
| Problem | Likely Cause | Solution |
| Flat, spread-out cookies | Egg whites were not whipped enough. Batter may have been over-mixed or left to sit too long before baking. | Whip egg whites until stiff and glossy. Fold gently and bake right after piping. |
| Soft or soggy texture | Cookies were underbaked or stored before cooling. Humid conditions can also affect texture. | Bake until fully dry. Let them cool on a wire rack. Store in a tightly sealed container. |
| Batter too stiff or dry | Flour was added all at once or the flour blend absorbs more moisture. | Sift flour in small amounts. Add a spoonful of whipped egg white to loosen the batter before folding in more. |
These fixes can help you get perfect results every time. Pay close attention to the egg whites, as they control the structure and rise. Timing also matters, so aim to bake without delay once the batter is ready.

How to Use Sponge fingers gluten free
Tiramisu
These sponge fingers are perfect for soaking up espresso and layering with mascarpone in classic tiramisu. Their crisp texture holds up well and creates the ideal bite. You can use them in your favorite gluten-free tiramisu recipe for authentic results.
Trifles and Charlottes
Use them as a base or side layer in a trifle bowl or charlotte mold. They add structure and absorb flavors from custards, creams, and fruit.
Cheesecake Crust
Crush the sponge fingers into fine crumbs and mix with a little melted dairy-free butter. Press the mixture into the bottom of a pan for a crisp and flavorful alternative to graham cracker crust.
Served with Coffee or Tea
These cookies are delicious on their own. Enjoy them with a hot cup of coffee or tea for a light and satisfying treat. Their slightly sweet flavor and crunchy texture make them perfect for dipping.
Serving and Storage Tips
Room Temperature Storage
Once the sponge fingers have cooled completely, place them in an airtight container. They will stay fresh for several days. For the longest shelf life, bake them until fully crisp before storing.
Freezing Instructions
You can freeze these cookies for up to three months. Place them in a single layer inside a freezer-safe container, then cover with a lid. Keep in mind that the texture may soften slightly after thawing. If you’re using them in tiramisu or other moist desserts, the slight softness will not be a problem.
For best results, allow frozen cookies to come to room temperature uncovered. This helps prevent sogginess and brings back some of the original crisp texture.
More Gluten-Free Cookies & Biscuits Recipes To Try!
Gluten Free Dairy Free Cookies
Gluten Free Peanut Butter Cookies

Gluten-Free Sponge Fingers
Ingredients
For the Batter
- 3 large eggs room temperature
- 1 extra egg white room temperature
- 1 teaspoon vanilla extract
- 1 cup gluten-free flour blend with xanthan gum
- 0.25 teaspoon fine sea salt
For the Sugar Mixture
- 0.75 cup granulated sugar divided into three equal parts
- 0.25 cup powdered sugar
Instructions
- Step 1: Preheat the oven to 350°F (175°C). Line two baking sheets with parchment paper.
- Step 2: Separate the eggs into two bowls. Place yolks in one and whites in the other. Make sure there is no yolk in the egg whites.
- Step 3: Whisk the egg yolks with one third of the granulated sugar and the vanilla extract until the mixture becomes thick, smooth, and slightly paler in color.
- Step 4: Beat the egg whites on medium speed until soft peaks form. Gradually add the remaining granulated sugar while continuing to whip until stiff, glossy peaks form.
- Step 5: Spoon a small amount of whipped egg whites into the yolk mixture to loosen it. Gently fold in the rest of the egg whites, being careful not to deflate the batter.
- Step 6: Sift the gluten-free flour and salt over the egg mixture. Fold gently until there are no streaks of flour remaining. Be careful not to over-mix.
- Step 7: Fill a piping bag fitted with a half-inch round tip and pipe lines about 3.5–4 inches long onto the prepared baking sheets. Leave space between each finger.
- Step 8: Mix the remaining granulated sugar with the powdered sugar and sift this mixture evenly over the piped batter to create a light crunch and golden finish.
- Step 9: Bake one tray at a time for 14–15 minutes or until the fingers are lightly golden, slightly cracked on top, and firm to the touch.
- Step 10: Let the cookies cool on the baking sheet for 5 minutes, then transfer to a wire rack to cool completely. The cookies will crisp up as they cool.
Notes
Conclusion
These gluten-free sponge fingers are crisp, light, and full of flavor. With just a few basic ingredients and clear steps, you can make a homemade version that outshines anything store-bought. Whether you’re layering them in tiramisu or enjoying them with coffee, they deliver the perfect balance of texture and taste.
The guide walks you through every detail, from choosing the right flour to piping and baking with confidence. You also get a troubleshooting chart, making it easy to fix any issue along the way.
If you make these gluten-free sponge fingers, please leave a comment and a star rating below. We’d love to hear which flour blend you used and how they turned out in your recipe.
Frequently Asked Questions
Do sponge fingers have gluten?
Yes, traditional sponge fingers are made with wheat flour, which contains gluten. This makes them unsafe for anyone with celiac disease or gluten intolerance.
Are there gluten free ladyfingers?
Yes, you can find gluten free ladyfingers both in stores and through homemade recipes. This guide shows you how to make them easily using common ingredients and no gluten.
What brands sell gluten free sponge fingers?
Some popular brands that offer gluten free sponge fingers include Schar and Kinnikinnick. While convenient, many people find homemade versions taste fresher and have a better texture.
Can sponge cake be gluten free?
Yes, sponge cake can be made gluten free by using a flour blend that includes a binder like xanthan gum. The method of whipping air into the eggs remains the same, making the texture just as light.
Can a person with celiac disease eat cake?
Yes, if the cake is made without any gluten ingredients and prepared in a gluten free environment. Always check labels and avoid cross-contact during baking.
What is surprisingly not gluten free?
Some ingredients that seem safe may contain hidden gluten. This includes baking powder, certain vanilla extracts, and even some brands of powdered sugar. Always read ingredient labels carefully.
Can celiacs get sick from touching gluten?
Yes, contact with gluten can lead to cross-contamination, especially if the person touches their mouth or food afterward. It’s important to keep cooking surfaces, utensils, and hands completely clean.
What flushes gluten out of your system?
There is no quick fix, but staying hydrated, eating simple whole foods, and resting can help the body recover after accidental gluten exposure. If symptoms are severe, consult a healthcare professional.