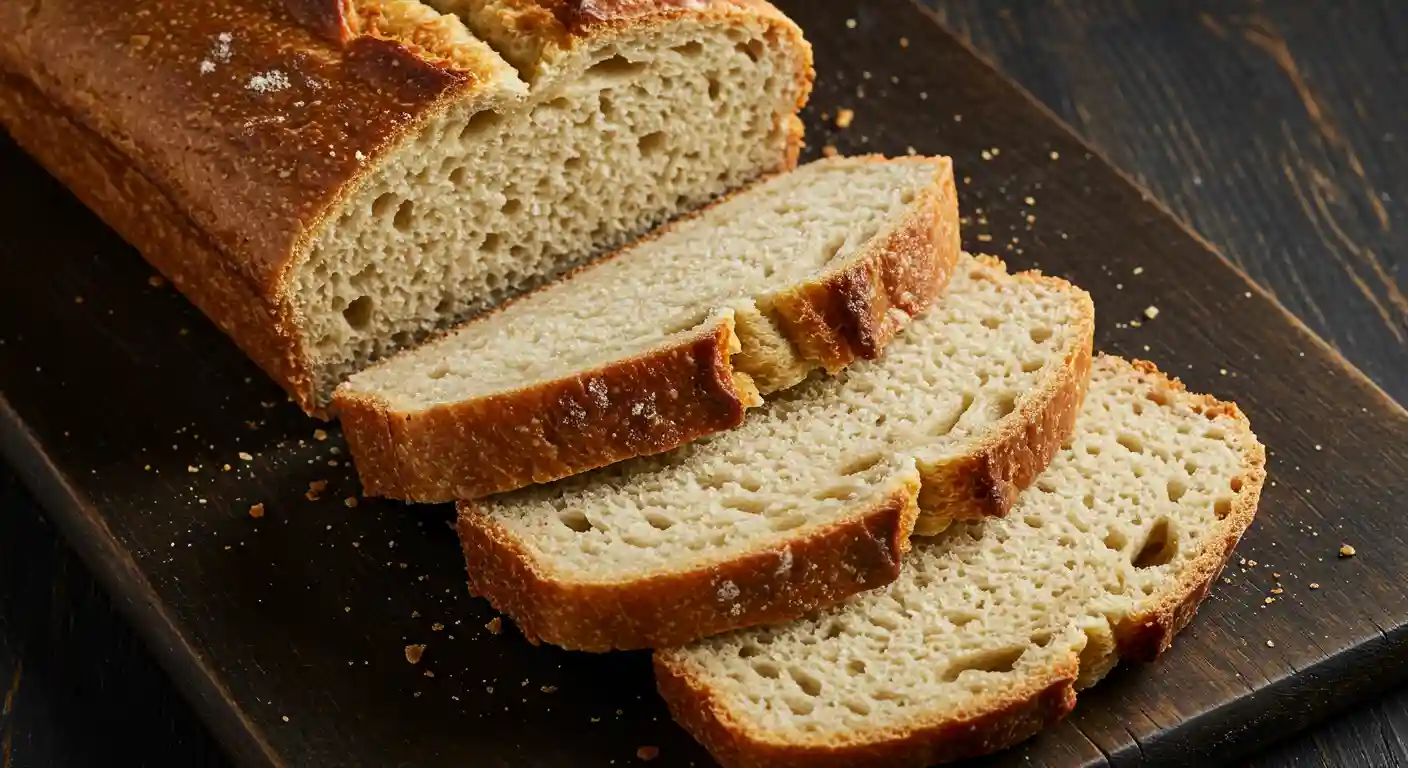
If you’re tired of overpriced store-bought gluten-free bread that tastes dry or crumbles after one bite, you’re not alone. After trying dozens of dense, crumbly loaves myself, I finally perfected this game-changing recipe. It solves that problem with a loaf that’s soft, fluffy, and sturdy enough for sandwiches or toast. Best of all, no complicated flours or fancy equipment are needed.
Below, you’ll find everything you need to succeed. From the best flour brands to storage tips and a full troubleshooting guide, this isn’t just a recipe. It’s your go-to manual for perfect gluten-free bread every time.
Table of Contents
Gluten-Free Bread Recipe
Why This Recipe Is the Best
- Soft and Fluffy Texture
Bends and squishes like real bread with no chalky crumble. - Made with Simple Ingredients
No need for rare flour blends or sourdough starters. - Quick and Easy Process
Short rise time and minimal prep make it weekday-friendly. - Naturally Dairy-Free
Plus, it includes tested vegan and gum-free options.
Ingredients Needed for Simple Gluten-Free Bread Recipe
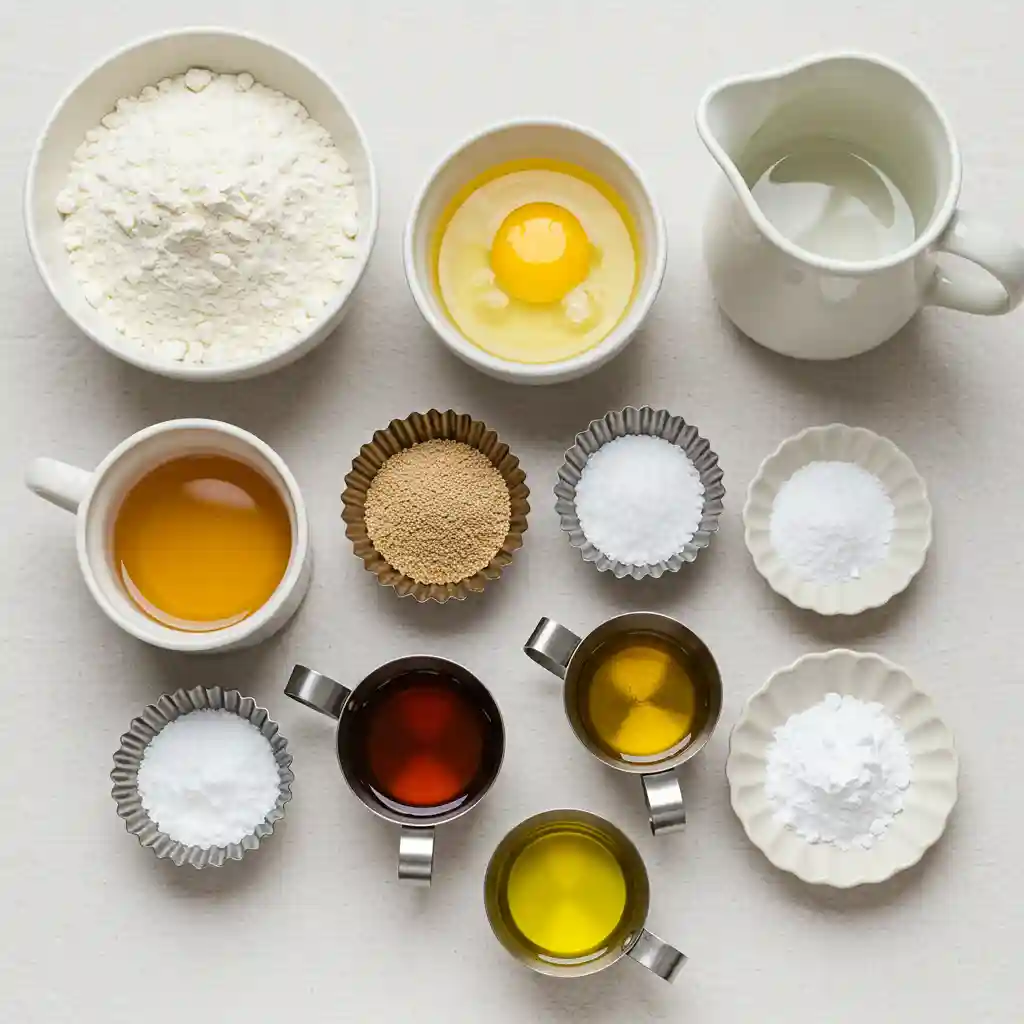
For the Dough Base
- 2 and 1/2 cups all-purpose gluten-free flour
(Pillsbury Gluten-Free is recommended for a balanced texture) - 1 teaspoon xanthan gum
(Skip this if your flour blend already includes it) - 1 teaspoon gluten-free baking powder
- 1 packet rapid rise or instant yeast (2 and 1/4 teaspoons)
- 1 teaspoon salt
Wet Ingredients
- 1 and 1/2 cups warm water (between 100 and 110°F)
- 1/4 cup extra virgin olive oil
- 1/4 cup honey
(You can substitute with agave nectar or maple syrup) - 1 teaspoon apple cider vinegar
- 3 large egg whites at room temperature
Essential Equipment
- Stand mixer with paddle attachment
- 9×5 inch loaf pan or 9×4 inch small Pullman loaf pan
- Digital kitchen scale
- Plastic wrap
- Serrated knife for slicing
The Best Gluten-Free Flours for Simple Gluten-Free Bread Recipe
| Flour Brand | Best For | Resulting Texture | Notes |
| King Arthur Measure for Measure | Everyday baking | Light and consistent | Great for those new to gluten-free baking |
| Pillsbury Gluten-Free | Sandwich bread | Soft and fluffy | Best match for this recipe |
| Bob’s Red Mill 1-to-1 | Rich flavor | Slightly denser crumb | Works well but may need more rise time |
| Caputo Fioreglut | Artisan loaves | Chewy with great rise | Contains wheat starch so not suitable for all diets |
Understanding Key Ingredients for Success
Every ingredient in this recipe plays a specific role. Understanding how they work together is the secret to making soft, fluffy gluten-free bread that doesn’t fall apart or turn gummy.
Gluten-Free Flour Blend
A good gluten-free bread needs a flour mix that includes lighter starches like white rice, potato, or tapioca. These ingredients mimic the softness of wheat flour and help the loaf rise without becoming dense. Stick with tested blends like Pillsbury or King Arthur to avoid surprises.
Xanthan Gum or Psyllium Husk
These act as binders to replace the elasticity that gluten would normally provide. Xanthan gum gives structure and holds the crumb together. If you’re avoiding gums, psyllium husk powder can be used as a substitute with a slightly more rustic texture.
Apple Cider Vinegar
This is not for flavor. It reacts with baking powder and yeast to boost the rise and make the loaf lighter. It also helps create a more stable structure so the bread doesn’t collapse.
Yeast and Baking Powder
Using both leavening agents gives the bread a stronger lift. Instant yeast kickstarts the rise quickly while baking powder adds an extra push in the oven, helping the center cook through.
Egg Whites or Egg Replacer
Egg whites help set the structure and add moisture. For a vegan version, you can replace them with aquafaba or chia eggs, but the texture may be slightly different. The eggs also help with that golden top crust.
How to Make Simple Gluten-Free Bread recipe
Follow these clear steps for a loaf that’s soft, sturdy, and perfect every time. Be sure to measure your ingredients carefully and use the correct pan size for the best results.
1. Prepare the pan and oven
Lightly spray a 9 by 5 inch loaf pan or a 9 by 4 inch Pullman pan with gluten-free cooking spray. Move your oven rack to the middle position for even baking.
2. Preheat your oven
Set the oven to 350°F or 175°C so it’s ready once the dough is proofed.
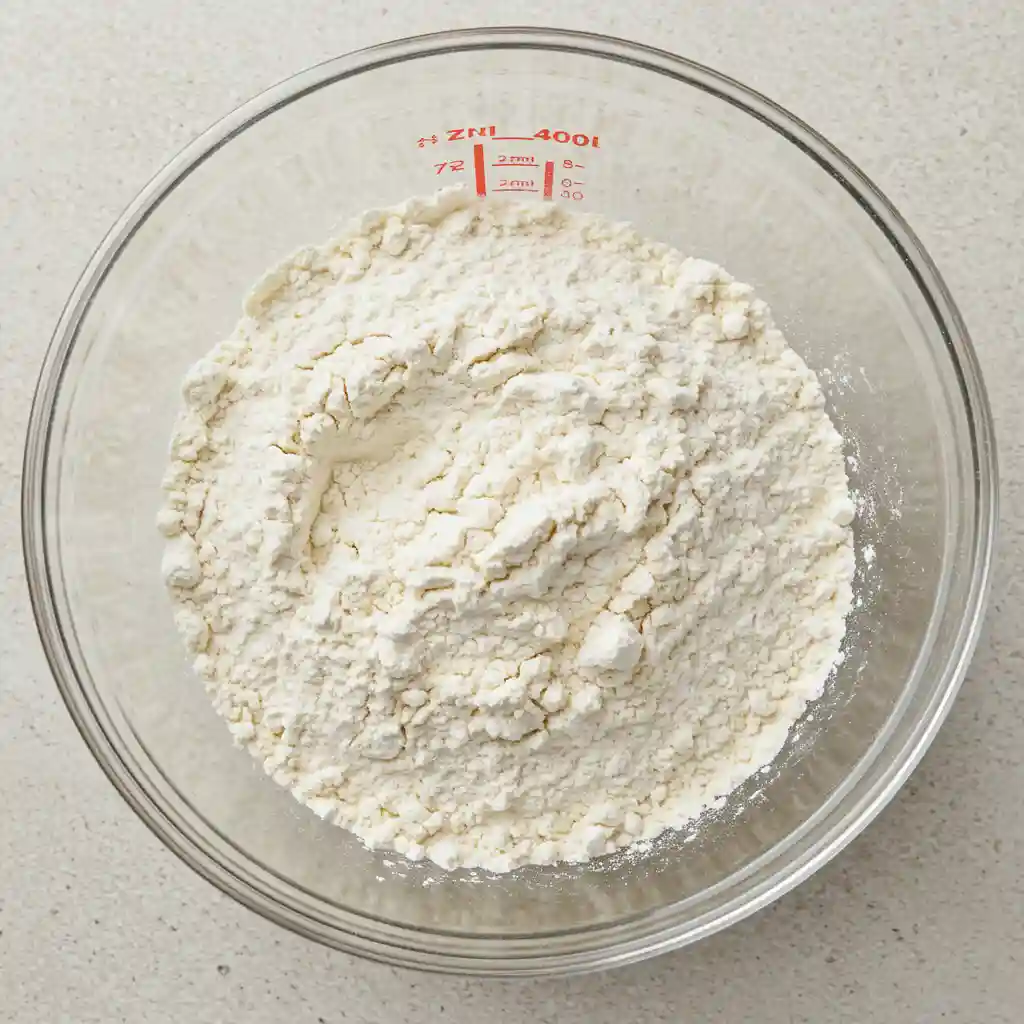
3. Mix the dry ingredients
In a large mixing bowl, combine the gluten-free flour, baking powder, and instant yeast. Stir until the mixture looks uniform.
4. Add wet ingredients
Pour in the olive oil, honey, apple cider vinegar, and warm water. Use a stand mixer fitted with the paddle attachment. Mix on low speed for one minute until everything is mostly combined.
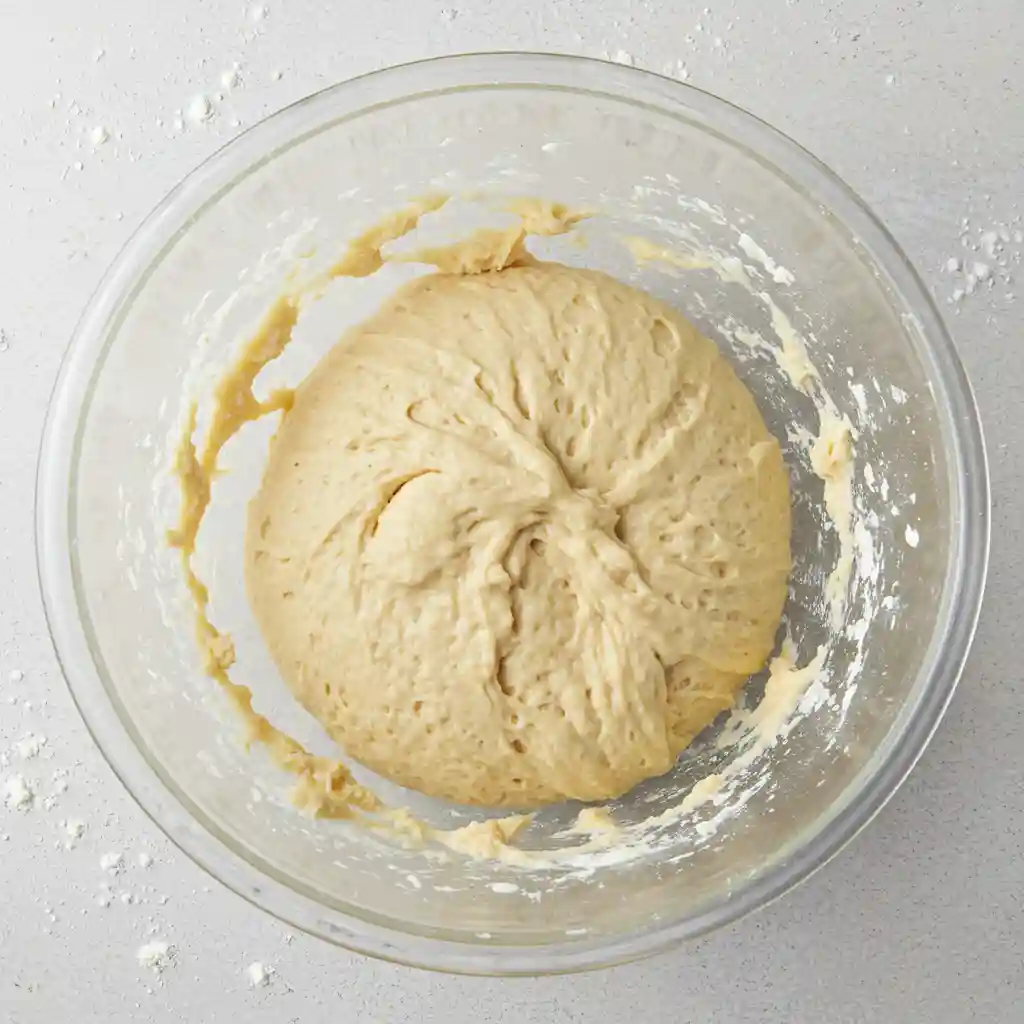
5. Add egg whites and salt
Drop in the egg whites and sprinkle the salt over the mixture. Turn the mixer to medium speed and beat for one minute. The dough should now look like thick cake batter, wet but holding shape.
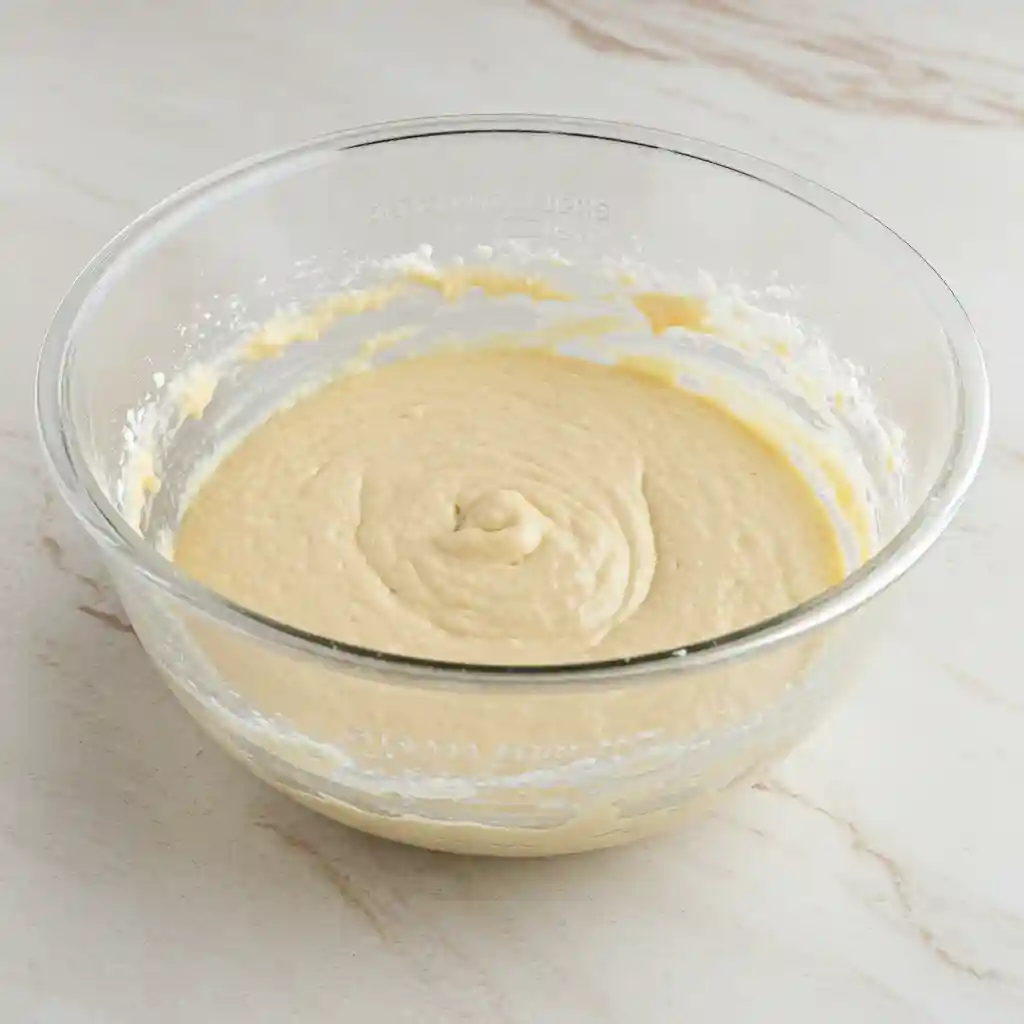
6. Transfer the dough to the pan
Scoop the batter into your prepared loaf pan. Smooth the top with a spatula or the back of a spoon. For best results, use a 9 by 4 inch Pullman loaf pan for a taller loaf.
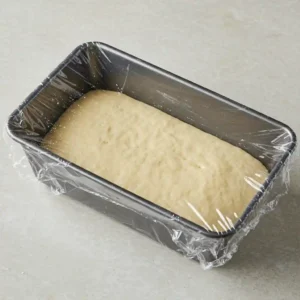
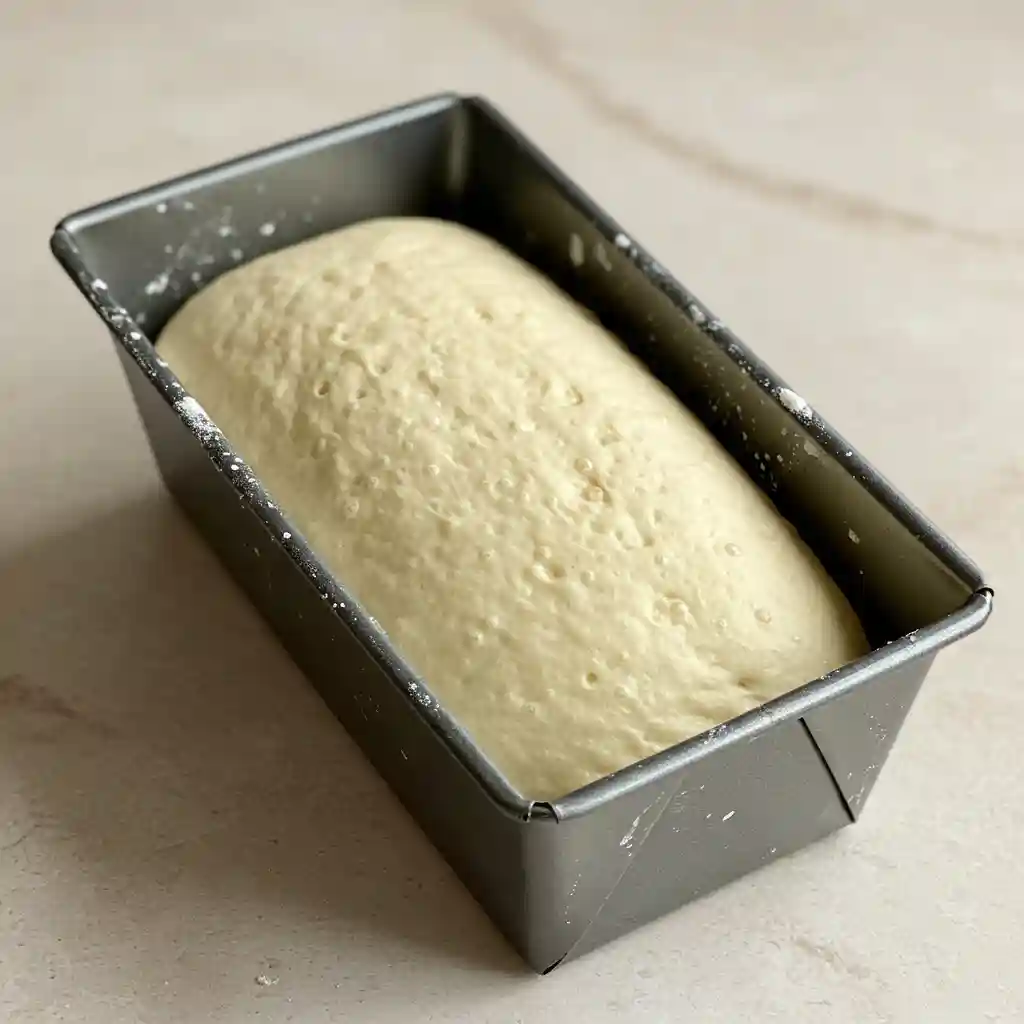
7. Proof the dough
Lightly spray a piece of plastic wrap and place it over the pan. Cover with a clean kitchen towel and let it rise in a warm place for 30 minutes. The dough should rise just above the rim.
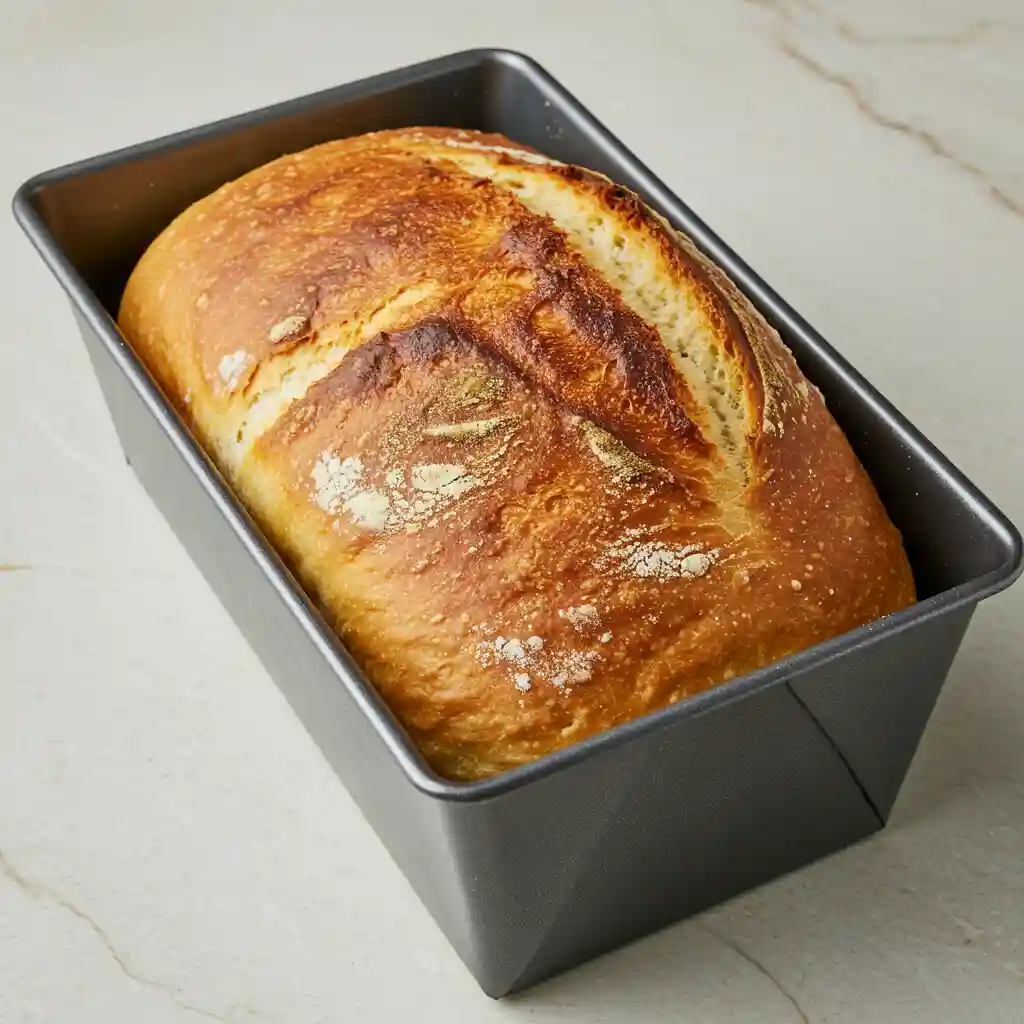
8. Bake the bread
Remove the plastic wrap and towel. Place the pan on the center oven rack and bake for 30 minutes. The loaf should be golden brown. To confirm doneness, insert a thermometer into the center. It should read between 205 and 210°F.
9. Cool in the pan briefly
Take the bread out of the oven and let it rest in the pan for 10 minutes. This helps it set before removing.
10. Transfer to a cooling rack
Carefully lift the loaf out and place it on a wire rack. Let it cool completely before slicing to avoid a gummy texture.
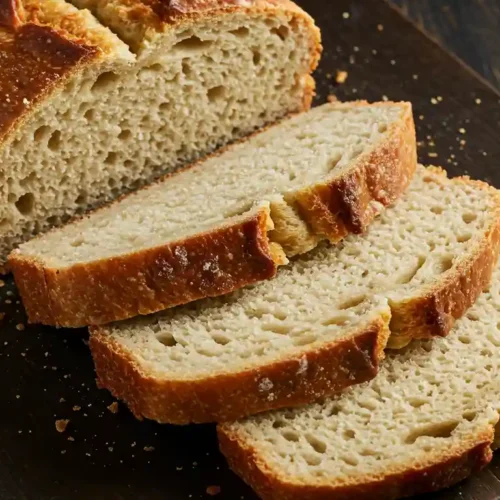
11. Slice and store properly
Once fully cooled, slice with a serrated knife. Store the bread in an airtight container at room temperature for up to 3 days or freeze slices for longer storage.
Making Dietary Variations (Tested and Perfected)
This recipe is flexible enough to work for various dietary needs. Whether you’re vegan, avoiding dairy, or sensitive to gums, these tested swaps will help you get great results without sacrificing texture or flavor.
Egg-Free or Vegan Option
To replace the egg whites, use one of the following per egg white:
- Three tablespoons of aquafaba
- One tablespoon of ground chia seeds mixed with two and a half tablespoons of water (let it sit for five minutes to gel)
Use three substitutes total to match the original recipe. Expect the loaf to be slightly less airy, but still soft and sliceable.
Dairy-Free Option
The original recipe is already dairy-free. It uses olive oil and warm water instead of butter or milk. If you prefer, you can swap the water with unsweetened almond milk or oat milk for a richer taste.
Xanthan Gum-Free Option
If you’re avoiding gums, substitute one tablespoon of psyllium husk powder for the xanthan gum. Stir it into the dry ingredients just as you would with xanthan. Expect a slightly more rustic crumb but with good structure and moisture.
Expert Tips for Foolproof Gluten-Free Bread
Use these tips to avoid common mistakes and make sure your bread turns out soft, fluffy, and fully cooked every time.
Measure flour accurately
Always use the spoon and level method. Scoop flour into your measuring cup with a spoon, then level it off with the flat edge of a knife. Never scoop directly from the bag, or you’ll end up with too much flour, which makes the bread dense.
Use the right pan
A smaller pan like an 8 by 4 inch or a 9 by 4 inch loaf pan gives the bread better height. A Pullman pan is even better for straight sides and an even shape.
Keep proofing under control
Let the dough rise only until it reaches just above the rim of the pan. Letting it go higher can make it collapse while baking.
Check doneness with a thermometer
Gluten-free bread can look done on the outside but be raw in the middle. Use an instant-read thermometer to make sure the internal temperature is between 205 and 210°F.
Wait before slicing
Resist the urge to cut while warm. Let the bread cool completely on a wire rack before slicing. This prevents a gummy texture and helps the loaf stay together.
Use a serrated knife
A sharp serrated knife makes it easy to cut clean slices without crushing the soft crumb.
Troubleshooting Guide: Common Problems and Solutions
Even with a great recipe, gluten-free bread can be tricky. Here’s a simple table to help you fix the most common issues and get consistent results every time.
| Problem | Possible Causes | Solution |
| My bread sank or collapsed | Dough was over-proofed, oven temperature was too low, or batter was too thin | Let the dough rise only slightly above the pan. Double-check oven temperature with a thermometer. If batter seems runny, reduce liquid slightly next time |
| My bread is dense or gummy | Flour was mis-measured, bread was underbaked, or dough was too dry | Use the spoon and level method. Bake until internal temp reaches 205 to 210°F. Add a bit more water if the batter is too stiff |
| My bread didn’t rise | Yeast was expired or killed by hot water, or dough was proofed in a cold spot | Check the date on your yeast. Use water that feels warm but not hot. Let the dough rise in a warm, draft-free location |
Each of these fixes has been tested with this recipe and can help turn a failed loaf into a success.
Serving and Storage Tips
Your homemade gluten-free bread will taste best when stored and served the right way. Here’s how to keep it fresh and ready whenever you need it.
Storing at Room Temperature
Once fully cooled, place the unsliced loaf in an airtight container or wrap it tightly in plastic wrap. Store it at room temperature for two to three days. Avoid refrigerating, as it can dry the bread out quickly.
Freezing for Long-Term Storage
To freeze, slice the cooled loaf using a serrated knife. Place a small piece of parchment paper between each slice so they don’t stick together. Put the slices in a freezer-safe bag and remove as much air as possible. Store in the freezer for up to three months.
Reheating and Toasting
You can toast slices straight from the freezer. There’s no need to thaw first. For a softer texture, reheat in the microwave for 15 to 20 seconds or warm in the oven at low heat.
Is Homemade Gluten-Free Bread Worth It? (Cost Breakdown)
Making your own gluten-free bread at home isn’t just healthier and tastier. It can also save you money over time. Let’s compare the average cost per loaf between this recipe and two popular store-bought brands.
| Bread Type | Approximate Cost per Loaf | Notes |
| Homemade (this recipe) | $3.50 | Based on mid-range flour, pantry staples, and egg whites |
| Udi’s Gluten Free Bread | $6.00 | Smaller loaf with fewer slices per package |
| Canyon Bakehouse White Bread | $7.00 | Higher price for better texture, still smaller portion |
With this recipe, you get a full-sized loaf that’s soft, bendable, and freezer-friendly. Plus, you control every ingredient, which is especially helpful for those with multiple dietary needs.
Simple Gluten-Free Bread Recipe
Ingredients
Dough Base
- 2.5 cups all-purpose gluten-free flour (Pillsbury Gluten-Free recommended)
- 1 teaspoon xanthan gum Skip if flour blend already includes it
- 1 teaspoon gluten-free baking powder
- 2.25 teaspoons instant yeast (1 packet)
- 1 teaspoon salt
Wet Ingredients
- 1.5 cups warm water Between 100–110°F
- 0.25 cup extra virgin olive oil
- 0.25 cup honey Substitute with agave nectar or maple syrup if preferred
- 1 teaspoon apple cider vinegar
- 3 large egg whites At room temperature
Instructions
- Lightly spray a 9×5 inch loaf pan or 9×4 inch Pullman pan with gluten-free cooking spray. Move oven rack to the middle position.
- Preheat oven to 350°F (175°C).
- In a large mixing bowl, combine the gluten-free flour, baking powder, xanthan gum (if using), and instant yeast. Stir until uniform.
- Add warm water, olive oil, honey, and apple cider vinegar. Mix on low speed using a stand mixer with paddle attachment for 1 minute.
- Add egg whites and salt. Beat on medium speed for 1 minute until the dough resembles thick cake batter.
- Transfer batter into prepared loaf pan. Smooth top with a spatula or spoon.
- Lightly spray plastic wrap and cover the pan. Cover with a towel and let rise in a warm place for 30 minutes or until the dough rises just above the rim.
- Remove coverings and bake for 30 minutes. Bread should be golden and internal temperature should reach 205–210°F (96–99°C).
- Let bread rest in the pan for 10 minutes after baking.
- Carefully transfer loaf to a wire rack and let it cool completely before slicing.
- Slice with a serrated knife and store in an airtight container at room temperature for up to 3 days or freeze for longer storage.
Notes
Nutrition Facts (Per Serving)
- Calories: 114 kcal
- Carbohydrates: 18 g
- Protein: 3 g
- Fat: 4 g
- Saturated Fat: 0.5 g
- Polyunsaturated Fat: 0.5 g
- Monounsaturated Fat: 3 g
- Sodium: 189 mg
- Potassium: 18 mg
- Fiber: 2 g
- Sugar: 5 g
- Vitamin C: 0.03 mg
- Calcium: 29 mg
Conclusion
This simple gluten-free bread recipe delivers everything you’ve been looking for. It’s soft, fluffy, and slices cleanly without falling apart. The ingredients are easy to find, the steps are clear, and the loaf turns out beautifully every time.
Whether you’re making sandwiches, morning toast, or just want a slice with butter, this bread fits the bill. It’s naturally dairy-free and includes reliable vegan and gum-free options too. Plus, the full guide covers everything from pan size to storage and even cost-saving tips.
Give it a try and let us know how it turns out in the comments. If you loved it, leave a rating and share the recipe with friends who need a better gluten-free option.
Frequently Asked Questions (FAQ)
What flours are best for gluten-free bread?
The best results come from using a balanced gluten-free flour blend that includes starches like rice flour, potato starch, and tapioca. Pillsbury Gluten-Free and King Arthur Measure for Measure are top choices. These blends offer a light texture and reliable structure.
What makes gluten-free bread fluffy?
A fluffy loaf starts with a wet dough. Unlike wheat bread, gluten-free dough should look more like thick cake batter. The combination of yeast, baking powder, egg whites, and a touch of vinegar helps create lift and softness inside the loaf.
Why put vinegar in gluten-free bread?
Vinegar reacts with the leavening agents to boost the rise and improve the crumb. It strengthens the structure of the bread, which reduces the risk of it collapsing as it cools.
How to get gluten-free bread to rise higher?
Use a smaller or high-sided loaf pan such as a Pullman pan. Make sure your yeast is fresh and that you proof the dough in a warm, draft-free spot. Also, let the dough rise only until it’s just above the rim to avoid over-proofing.
What are common gluten-free bread mistakes?
Common mistakes include using too much flour, underbaking, or slicing the bread before it cools. Always measure flour using the spoon and level method, check doneness with a thermometer, and wait for the loaf to cool before slicing.
What is the trick to making good gluten-free bread?
Use a wet, sticky dough. Don’t over-proof. Weigh your ingredients with a digital scale. Let the loaf cool fully before slicing. And choose a smaller loaf pan for better height. These small steps make a big difference in texture and taste.