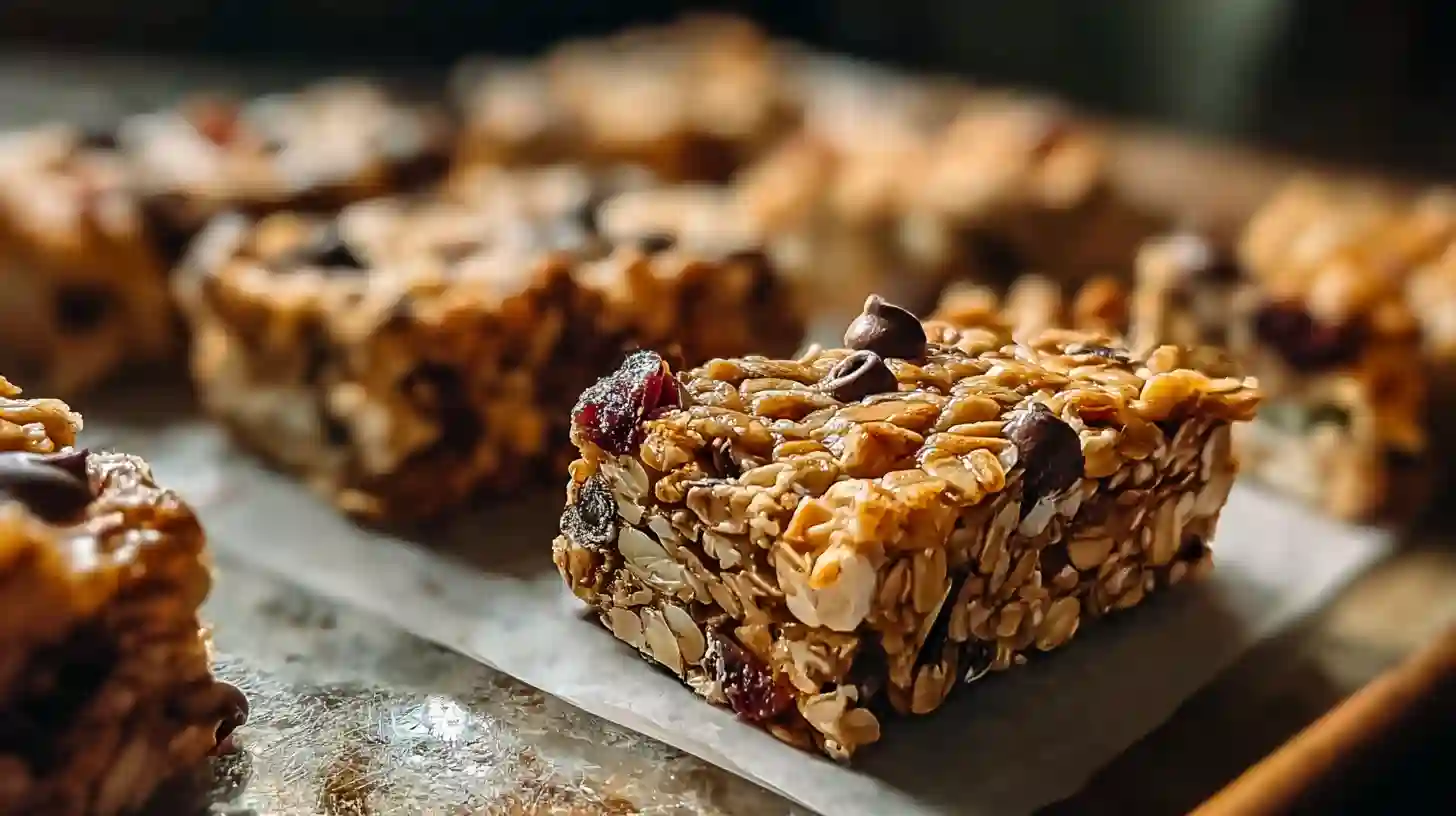
No Bake Granola Bars are the epitome of convenience, health, and taste crafted without the need for an oven yet packed with wholesome ingredients like oats, seeds, and natural sweeteners.
This comprehensive guide explores every detail about creating these nutritious snacks at home, from ingredient selection to storage and flavor variations.
Whether for a quick breakfast, an energizing snack, or a balanced bite on the go, this article reveals the science, art, and method behind perfect homemade granola bars that are both simple and satisfying.
Love and Lemons Homemade Granola Bars
Equipment
- 8×8 Baking Pan
- Parchment Paper
Ingredients
Nut Butter
- 1 cup very smooth creamy natural peanut butter (or cashew butter)
Sweetener & Flavor
- ⅔ cup honey
- 1 tsp vanilla extract
- ½ tsp sea salt (heaping)
Dry Base
- 2½ cups whole rolled oats
- ⅓ cup mini chocolate chips
- 3 tablespoons pepitas (or crushed peanuts or cashews)
Instructions
- Line an 8×8 baking pan with parchment paper.
- In a large bowl, stir together the peanut (or cashew) butter, honey, vanilla extract, and sea salt until smooth.
- Add the rolled oats, mini chocolate chips, and pepitas (or nuts). The mixture might seem dry at first keep stirring until everything is incorporated.
- Press the mixture firmly into the parchment-lined pan. Use a second piece of parchment and the back of a measuring cup to smooth and flatten the top.
- Chill in the fridge for at least 1 hour. Once firm, slice into bars.
- Store bars in the fridge (up to a week) or freeze (up to 2 months). Use parchment paper between layers so bars don’t stick together.
Notes
Why Choose No Bake Granola Bars?
When I first learned the secret to making no bake granola bars, it was from my French neighbor, Colette.
She believed that food should be simple, nourishing, and joyfu never complicated. Watching her press a mixture of oats, nuts, and honey into a tray without even turning on the oven fascinated me.
From that day forward, I began creating my own versions, understanding that these bars are far more than just snacksthey represent balance, time-saving creativity, and mindful nourishment.
Benefits of No-Bake Bars
The appeal of no bake granola bars lies in their sheer practicality. They require no baking time, which conserves energy and makes them ideal for warm climates or quick meal preparation. Moreover, the ingredients retain more nutrients since they are not exposed to prolonged heat. These bars are perfect for:
- Busy mornings when breakfast must be quick yet wholesome.
- Midday energy boosts without processed sugar spikes.
- Travelers or parents needing portable, non-messy snacks.
The method also allows endless flexibility making them an excellent entry point for anyone exploring DIY granola bars for the first time.
Nutritional Advantages
Unlike commercial options loaded with additives, homemade granola bars prioritize quality ingredients. Whole oats offer complex carbohydrates and fiber, nuts contribute healthy fats, and natural sweeteners like honey or maple syrup provide gentle energy release. Seeds such as chia or flax add essential omega-3 fatty acids. The balance of macronutrients ensures sustained energy while avoiding the empty calories of conventional packaged snacks.
Core Ingredients for No Bake Granola Bars
When Colette prepared her bars, she always said, “Every ingredient must have a purpose.” She was right. The success of healthy granola bar recipes depends on the synergy between texture, flavor, and nutrition. Each element has a functional role binding, flavoring, or adding crunch.
Oats Rolled vs. Quick vs. Gluten-Free
- Rolled oats provide a firm, chewy texture that forms the foundation of the bars.
- Quick oats absorb liquids faster, resulting in a softer consistency suitable for soft granola bars.
- Gluten-free oats ensure the recipe suits dietary needs without compromising taste or structure.
Choosing the correct oat type directly affects texture; blending rolled oats into smaller flakes can create a middle ground between chewiness and smoothness.
Binders and Sweeteners
Binding ingredients are crucial for holding the bars together:
- Natural nut butter (such as peanut, almond, or cashew) creates cohesion and adds protein.
- Honey or maple syrup introduces sweetness and acts as a mild preservative.
- Vegan alternatives like brown rice syrup or agave can be substituted when necessary.
The right binder ratio determines firmness too little causes crumbling, while too much makes the bars sticky.
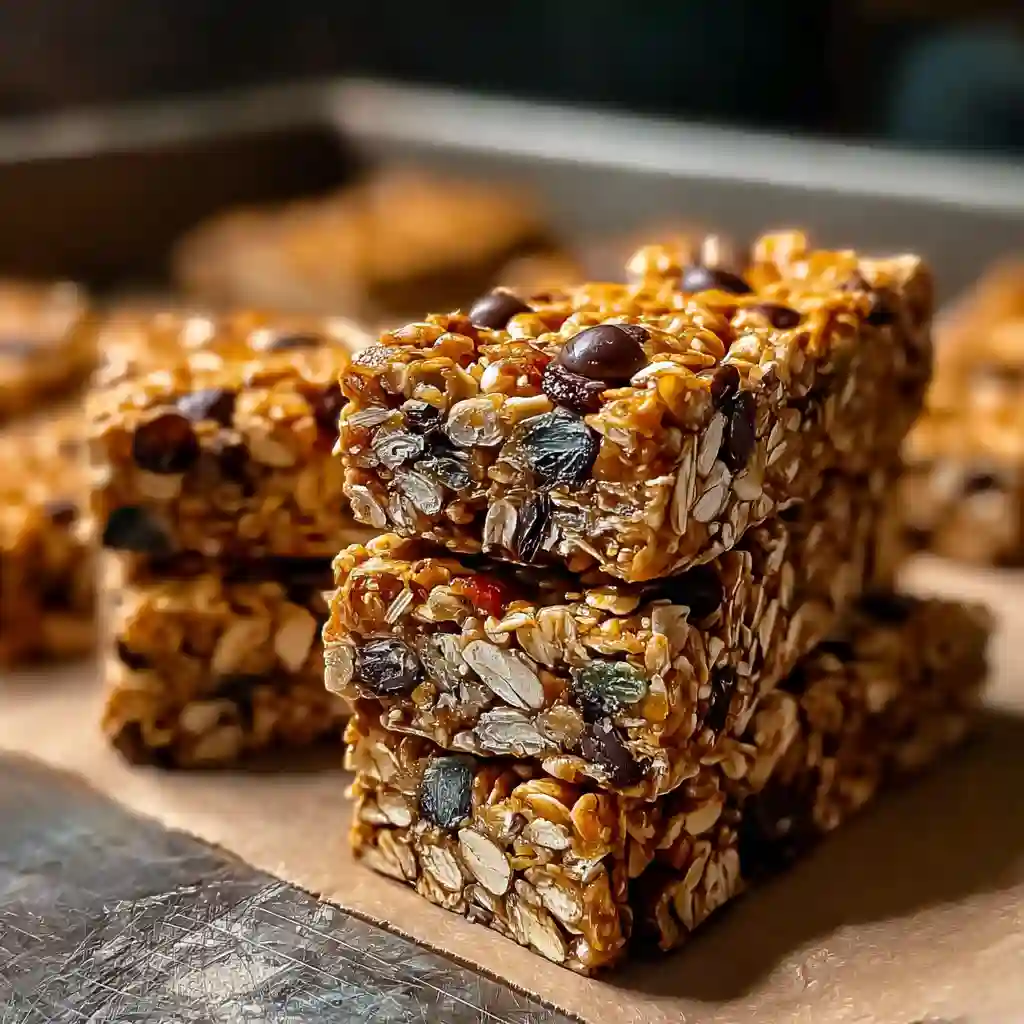
Add-ins and Mix-ins
The fun begins here. Incorporate:
- Chopped nuts (almonds, pecans, walnuts) for crunch.
- Seeds (chia, flax, pumpkin) for fiber and omega-3s.
- Dried fruits (cranberries, dates, apricots) for sweetness.
- Chocolate chips or shredded coconut for flavor contrast.
These enhance both texture and nutritional profile, making every bite dynamic and satisfying.
Optional Extras
Add depth with:
- Protein powder for gym-goers.
- Puffed rice for extra crunch.
- A pinch of sea salt to balance sweetness.
- Warming spices like cinnamon or nutmeg to enrich aroma.
Step-by-Step No Bake Granola Bar Recipe
I still remember the afternoon I taught my niece how to make easy homemade granola bars. She was amazed that something so healthy could also taste like dessert. The process is intuitive, requiring only precision in mixing and patience during chilling.
Preparing Dry Ingredients
In a large bowl, combine oats, nuts, seeds, and your chosen mix-ins. Stir thoroughly to ensure even distribution. If you prefer finer bars, pulse the oats briefly in a blender before mixing. This small adjustment improves binding and texture consistency.
Heating and Combining the Binder Mixture
In a saucepan, gently warm nut butter with honey or maple syrup until the mixture becomes fluid and glossy.
Avoid overheating; high temperatures may affect nutrient integrity. Stir in vanilla extract for fragrance and a pinch of salt to amplify flavors. This mixture should be warm, not hot, when combined with the dry ingredients.
Combining Wet and Dry
Pour the binder mixture over the dry ingredients. Mix until every oat and nut is evenly coated. This step requires patience; inadequate mixing can cause uneven binding.
Press the mixture into a lined baking pan, using a spatula or the back of a spoon to compact it firmly. Firm pressure ensures structural integrity once cooled.
Chilling and Setting
Refrigerate the mixture for at least one hour. Chilling solidifies the natural fats and sweeteners, transforming a loose mixture into cohesive bars. Skipping or shortening this step results in crumbling. Once set, slice neatly into bars or squares and store for later enjoyment.
Variations and Customizations: Make It Your Own
Experimentation is the hallmark of creativity. My aunt loved mixing cultural influences into her granola cookies recipe, turning each batch into a surprise. The same principle applies here there are infinite possibilities for customization.
Flavor Variations
- Chocolate Chip Granola Bar Recipe – Classic sweetness with mini chips or cocoa nibs.
- Fruit and Nut Bars – Combine dates, apricots, and pistachios for Mediterranean inspiration.
- Coconut-Date Bars – Natural sweetness and tropical aroma.
- Nut and Seed Bars – Enhanced crunch and protein.
- Holiday-Spiced Bars – Infused with cinnamon, nutmeg, and clove.
Dietary Adaptations
- Vegan: Replace honey with maple or agave syrup.
- Nut-Free: Substitute sunflower seed or tahini butter.
- Low-Sugar: Use mashed banana or pureed dates as binders.
- Gluten-Free: Opt for certified gluten-free oats.
Texture Tweaks
For chewy results, increase binder ratio or use quick oats. For crunchier texture, incorporate puffed rice or chill longer. Processing oats partially can yield balanced chewiness.
Storage, Shelf Life, and Serving Tips
Proper storage preserves texture and freshness. I once left my granola bites on the counter for two days, only to find them slightly sticky. Since then, I learned that each method has its own effect on longevity.
Refrigeration vs. Room Temperature vs. Freezing
- Refrigeration: Keeps bars firm and fresh for up to 7 days.
- Room Temperature: Suitable for 2–3 days in a cool environment.
- Freezing: Extends shelf life to two months. Wrap bars individually in parchment before freezing.
Shelf Life
Average shelf life depends on humidity and binder content. Bars rich in nut butter and natural sweeteners tend to retain moisture longer than those with drier bases.
Serving Suggestions
Serve with:
- Fresh fruit and yogurt for breakfast.
- A glass of milk or plant-based beverage for balance.
- As compact energy snacks for outdoor activities or study sessions.
Troubleshooting Common Problems
Even experienced cooks face setbacks. Early in my journey, my first date granola bars crumbled miserably. Troubleshooting, however, transforms failures into learning.
Bars Too Crumbly
Causes:
- Insufficient binder.
- Overly dry oats.
- Weak pressing technique.
Solutions: - Add extra nut butter or honey.
- Process oats for smaller flakes.
- Press mixture firmly before chilling.
Bars Too Hard or Dry
Causes:
- Excess oats.
- Over-chilling.
Solutions: - Increase binder.
- Allow bars to soften at room temperature briefly before serving.
Bars Too Sticky
Causes:
- Too much sweetener or insufficient chilling.
Solutions: - Reduce honey or syrup.
- Extend refrigeration.
- Separate bars with parchment layers.
Nutrition, Health, and Dietary Considerations
The nutritional composition of healthy granola bars is a major advantage over commercial snacks. Below is a simplified example per serving (approx. 40g):
| Nutrient | Amount | Benefit |
| Calories | 180 | Moderate energy source |
| Protein | 6g | Sustains muscle health |
| Fat | 8g | Healthy fats from nuts/seeds |
| Fiber | 3g | Aids digestion |
| Sugars | 6g | Natural sweeteners only |
Making Them Healthier
- Use unsweetened dried fruits.
- Add seeds for fiber.
- Limit added sugar.
- Substitute half the oats with quinoa flakes or millet for diversity.
Dietary Substitutions
- Replace nut butters with seed butters for allergies.
- Use certified gluten-free oats.
- For vegan versions, opt for maple syrup instead of honey.
No Bake vs. Baked Granola Bars
Convenience and Preparation
No bake granola bars triumph in speed and simplicity no oven, minimal cleanup, and shorter preparation time. In contrast, baked bars require careful timing and cooling.
Texture and Flavor
No bake versions remain soft and chewy. Baked ones tend to be crunchier due to caramelization. Both are delicious; the choice depends on personal preference.
Shelf Life and Storage
Baked bars generally last longer at room temperature, but no bake types maintain freshness and chewiness when refrigerated.

Frequently Asked Questions
How long to refrigerate no bake granola bars?
At least one hour is necessary for the bars to firm properly. Longer chilling (up to overnight) enhances texture and structure.
What kind of oats to use for no bake granola bars?
Rolled oats are ideal for balanced chewiness. Quick oats yield a softer texture, while gluten-free oats cater to specific dietary needs.
What is a good binding agent for granola bars?
Natural nut butter, honey, or maple syrup provide cohesive texture and nutritional richness.
Can you make granola bars without baking?
Absolutely. Proper mixing, firm pressing, and refrigeration create structure without any baking.
Pro Tips from Experienced Bakers
- Toasting Ingredients: Lightly toast oats and nuts before mixing for enhanced flavor without violating no-bake status.
- Parchment Handles: Leave parchment paper overhangs to lift bars easily from the pan.
- Creative Storage: Wrap bars individually, freeze portions, and thaw before use for ultimate freshness.
Summary and Why This Recipe Works
Homemade granola bars epitomize balance: health, taste, and convenience. They offer control over ingredients, reduce waste, and adapt to any lifestyle.
By following these structured stepschoosing quality oats, mastering binder ratios, and personalizing mix-insyou can achieve professional results in your own kitchen.
Try this method today; your next healthy snack may take just fifteen minutes to prepare yet offer lasting satisfaction.